Installation process for enterprise apps on iOS 17 and earlier
There are two methods for installing enterprise apps on iOS devices running version 17 or earlier:
Option 1: Over-the-Air (OTA)* installation via browser
*Over-the-Air (OTA) refers to any method of transferring data or conducting transactions wirelessly using the cellular network, rather than through a cable or other local connection. This term is commonly used to describe the process of downloading or uploading content or software, such as ringtones, images, or application updates.
Step 1. Initiate Installation:
- Open a browser and enter the provided URL.
- Start the app installation process.
Step 2. Trust the Profile:
- Tap the app icon once installation is complete.
- When prompted with an untrusted profile dialog, navigate to Settings > General > Profiles.
- Locate and approve the profile associated with the app.
Step 3. Launch the App:
- Open the app to begin using it.
Option 2: Installation via Application management
Step 1. Access Application Management:
- Navigate to the Application Management section and upload your app.
Step 2. Initiate Installation:
- Click the Install button.
- In the dialog box, select the Enterprise App option.
Step 3. Complete Installation:
- Proceed with the installation.
- This process may take up to 5 minutes and does not require manual confirmation of the enterprise profile.
Installation process for enterprise apps on iOS 18 +
Installation via Application Management (Mandatory)
Step 1. Access Application Management:
- Navigate to the Application Management section and upload your app.
Step 2. Initiate Installation:
- Click the Install button.
- In the dialog box, select the Enterprise App option.
Step 3. Complete Installation:
- Proceed with the installation.
- This process may take up to 5 minutes.

Over-the-Air (OTA) installation via browser is strictly prohibited for iOS 18 and above.
Using this method on iOS 18+ will prompt the device to reboot upon confirming the enterprise profile. Restarting the device will cause it to enter maintenance mode and become inaccessible.
Application management tab
You can manage your applications in the Application management tab: upload, install, uninstall, remove. You can find the tab for every device in the session in the Pane.
States
The Application management tab has two states:
Empty
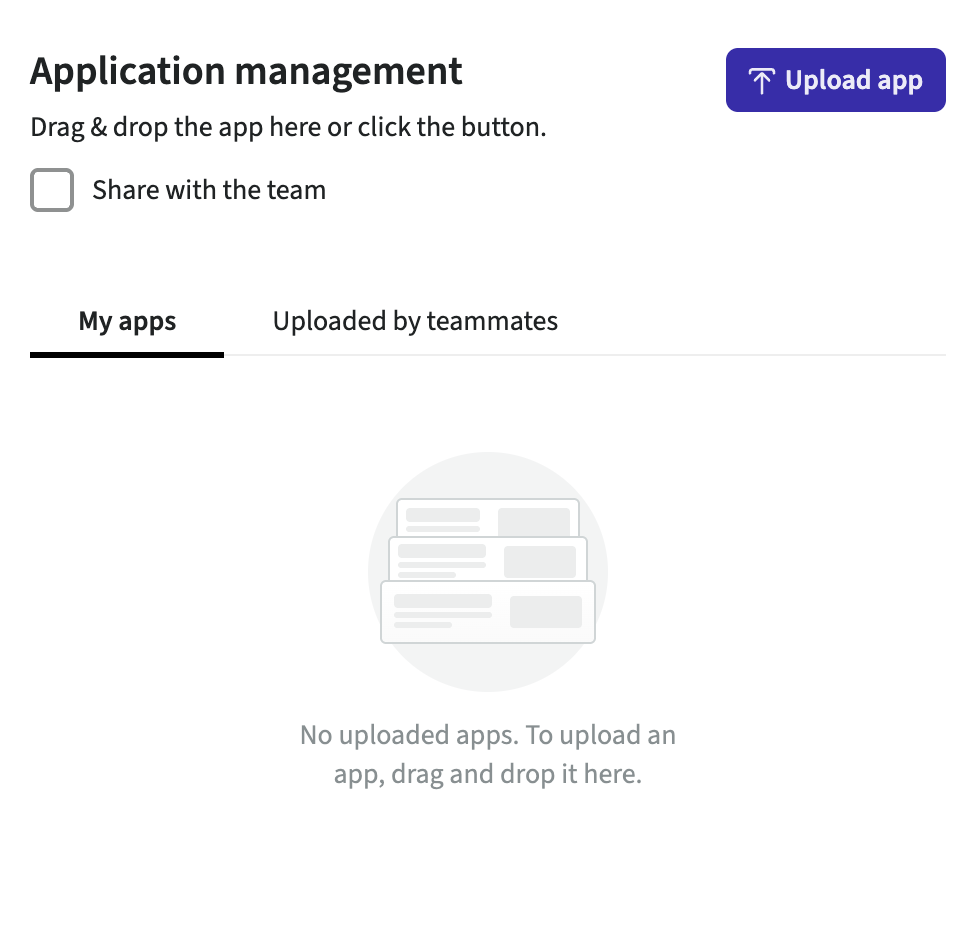
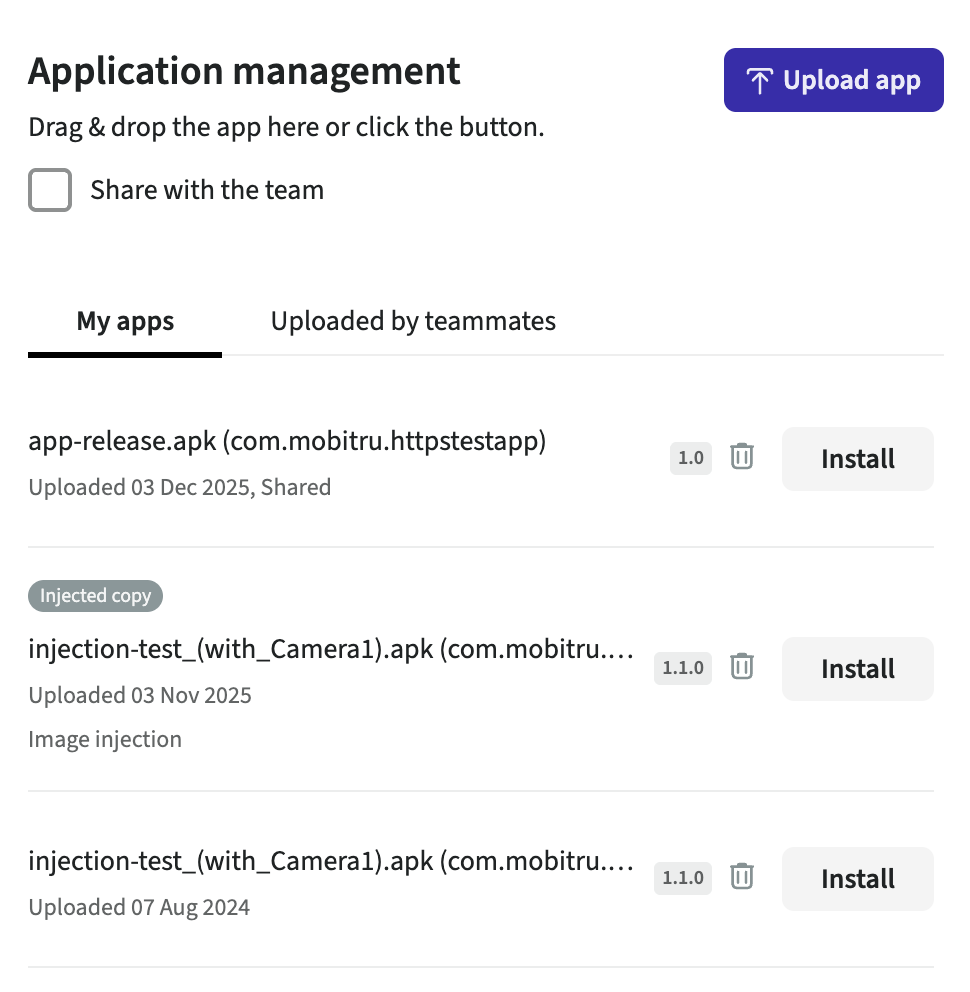
With applications
Elements
You will see the following elements in the Application management tab:
- Upload app button – opens folders of your computer to choose an application file
- Install/Uninstall button – installs and uninstalls the application on a device
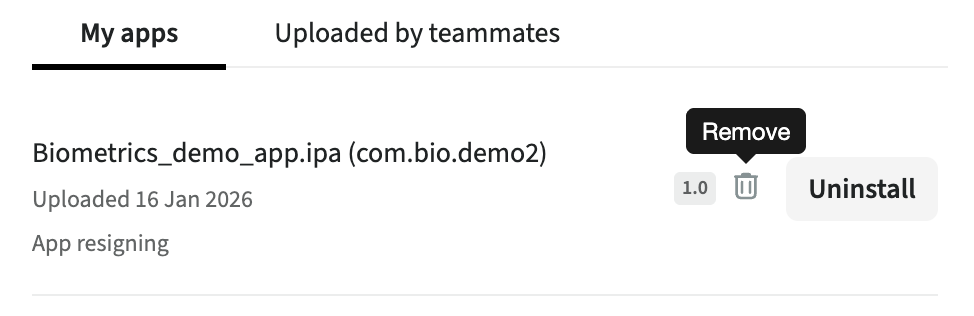
- Remove button – deletes the application from the Install App tab
- App name
- App build
- Checkboxes labels – information about the checkboxes you chose for installing an application
Supported app extensions
You can upload files with the following extensions:
- Android: .apk
- iOS: .ipa, .zip
Steps to upload an application
To upload an application file, you need to choose an option depending on whether the Application management tab is empty or has applications:
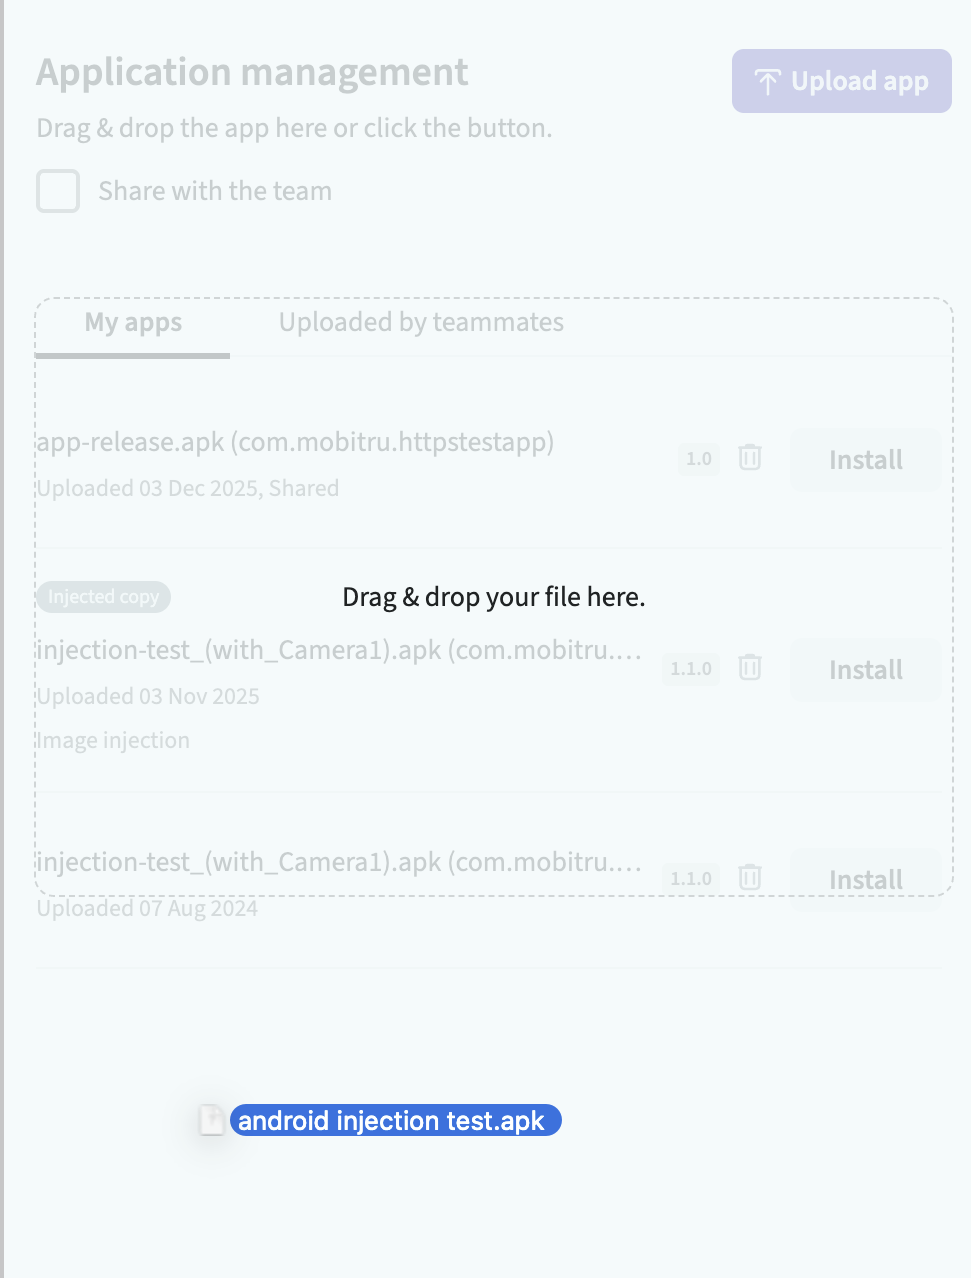
Option 1: Drag and drop (the tab is empty or with apps)
- Open the Pane -> Application management.
- Choose a file on your PC.
- Drop it to the tab.
Option 2: File explorer (the tab is empty)
- Open the Pane -> Application management.
- Click on Upload app.
- Choose a file.

Steps to install an application
After uploading an application, you can click on Install to initiate the installation process. During the installation, a progress bar will be displayed.

Checkboxes
For iOS and Android, you will see a bit different modals with checkboxes. The following modal appears when you click on Install for an iOS application:
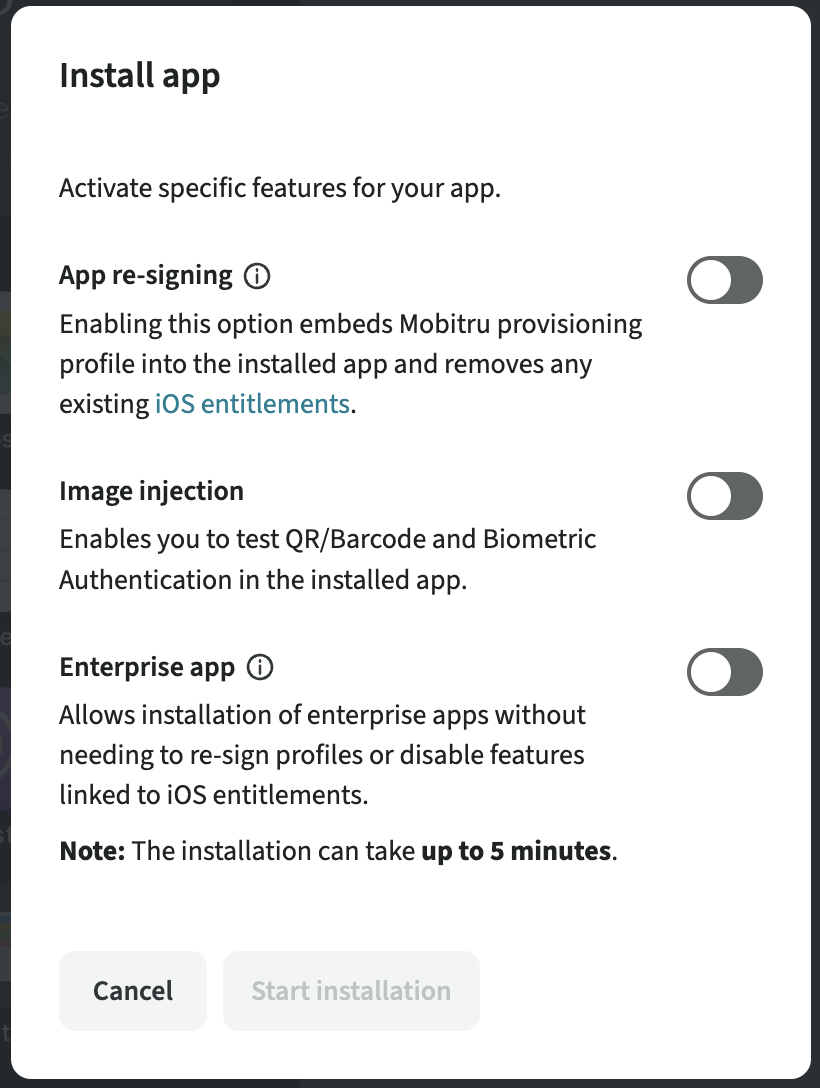
Here you need to choose the checkboxes:
App-resigning: adds the Mobitru provisioning profile into the application.
Image injection: required when you work with QR/Barcode or Biometric Authentication features.
Enterprise app: installs apps signed with the enterprise profile without re-signing.
To clarify, App Re-signing influences features based on iOS entitlements. For instance, Push notifications, Login via Apple Id, etc. To avoid it, you can add the Mobitru devices UDIDs to your developer program, re-build the application and install the app without the Re-signing checkbox on the added devices. The Image injection feature can be added to your test build. To find out how to do it, contact support@mobitru.com.
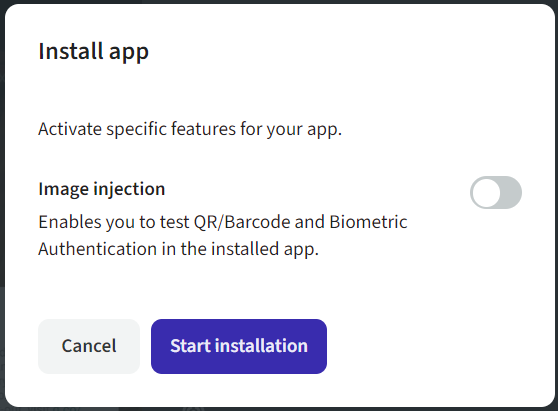
For Android, the modal contains one checkbox. That is to say, you need to choose it before installation to test QR/Barcode scanning or Biometric authentication request.
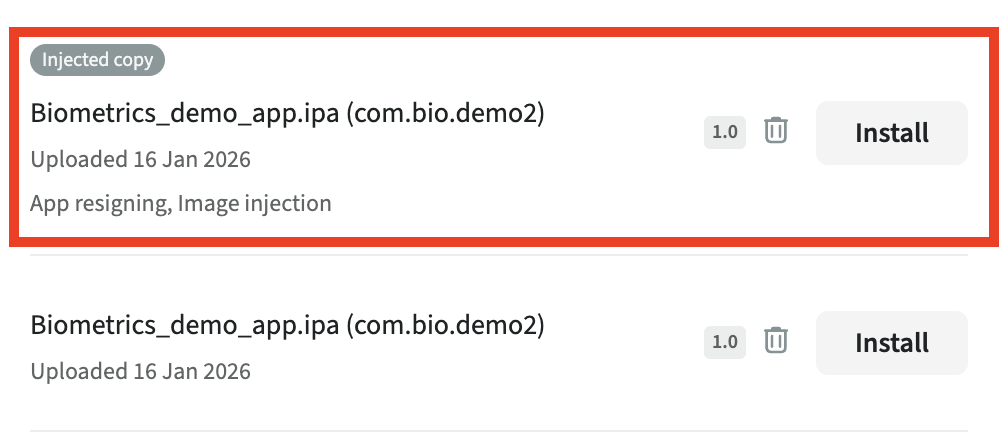
Injected copy
When you use the Image injection toggle for an app installation, a copy of the application will appear in the Application management tab. This copy has already been re-signed and injected with the library that allows QR/Barcode scanning and Biometric authentication. That is why, the injected copy is installed much quicker.
The modal with the options for installation will not appear when you click on Install for the app labelled as Injected copy.
How to uninstall an application
To uninstall an application from a device, click on the Uninstall button. The application file will remain in the Application management tab.

How to remove an application
To remove an application file from the Application management tab, click on the Remove button. If the application is installed on the device, it will not be uninstalled after removing an application file.