Appium Inspector integration
Appium Inspector is an open-source Tool for inspecting GUI of mobile apps, which includes finding and interacting with elements, recording performed actions, and sending commands to the OS.
More details can be found here.
Mobitru supports Appium Inspector versions from 2023.11.1 onwards.
Watch our step-by-step YouTube instruction on the Appium Inspector and Mobitru integration or follow the steps below the video:
To start inspecting your application:
Step 1: Find and take a device
Find and take the appropriate device on Devices tab or using our APIs:
Here is an example of cURL request to find a device via API:
Android:

curl --location --request GET 'https://app.mobitru.com/billing/unit/<BILLING_UNIT>/automation/api/device/android?model=Pixel 6' \
--header 'Authorization: Bearer <ACCESS_KEY>'

iOS:

curl --location --request GET 'https://app.mobitru.com/billing/unit/<BILLING_UNIT>/automation/api/device/ios?version=16.2' \
--header 'Authorization: Bearer <ACCESS_KEY>'
Here is an example of cURL request to take a device via API :
Android:

curl --location --request POST 'https://app.mobitru.com/billing/unit/<BILLING_UNIT>/automation/api/device/26281JEGR04493' \
--header 'Authorization: Bearer <ACCESS_KEY>'

iOS:

curl --location --request POST 'https://app.mobitru.com/billing/unit/<BILLING_UNIT>/automation/api/device/00008101-00042D8A1190001E' \
--header 'Authorization: Bearer <ACCESS_KEY>'
Step 2: Upload and install your app
Upload your Android app (.apk file) or iOS app (.ipa file) to the Mobitru and perform the app installation in the Device area or using our REST API.
Here is an example cURL request to upload the app:
curl --location --request POST 'https://app.mobitru.com/billing/unit/<BILLING_UNIT>/automation/api/v1/spaces/artifacts' \
--header 'x-File-Name: AppDemo.apk' \
--header 'X-Content-Type: application/zip' \
--header 'Authorization: Bearer <ACCESS_KEY>' \
--form 'file=@"/path/to/app/file/app-debug.apk"' \
--form 'checksum="None"'
Here is an example of cURL request to install the app via API (app id could be found in response of upload request):
curl --location --request GET 'https://app.mobitru.com/billing/unit/<BILLING_UNIT>/automation/api/storage/install/<device_udid>/<uploaded_app_id>' \
--header 'Authorization: Bearer <ACCESS_KEY>'
As a result, you will receive 201 Created response.
Step 3: Open the installed Inspector app and select Mobitru
After installation, open the Appium Inspector app and select Mobitru from the list of cloud providers: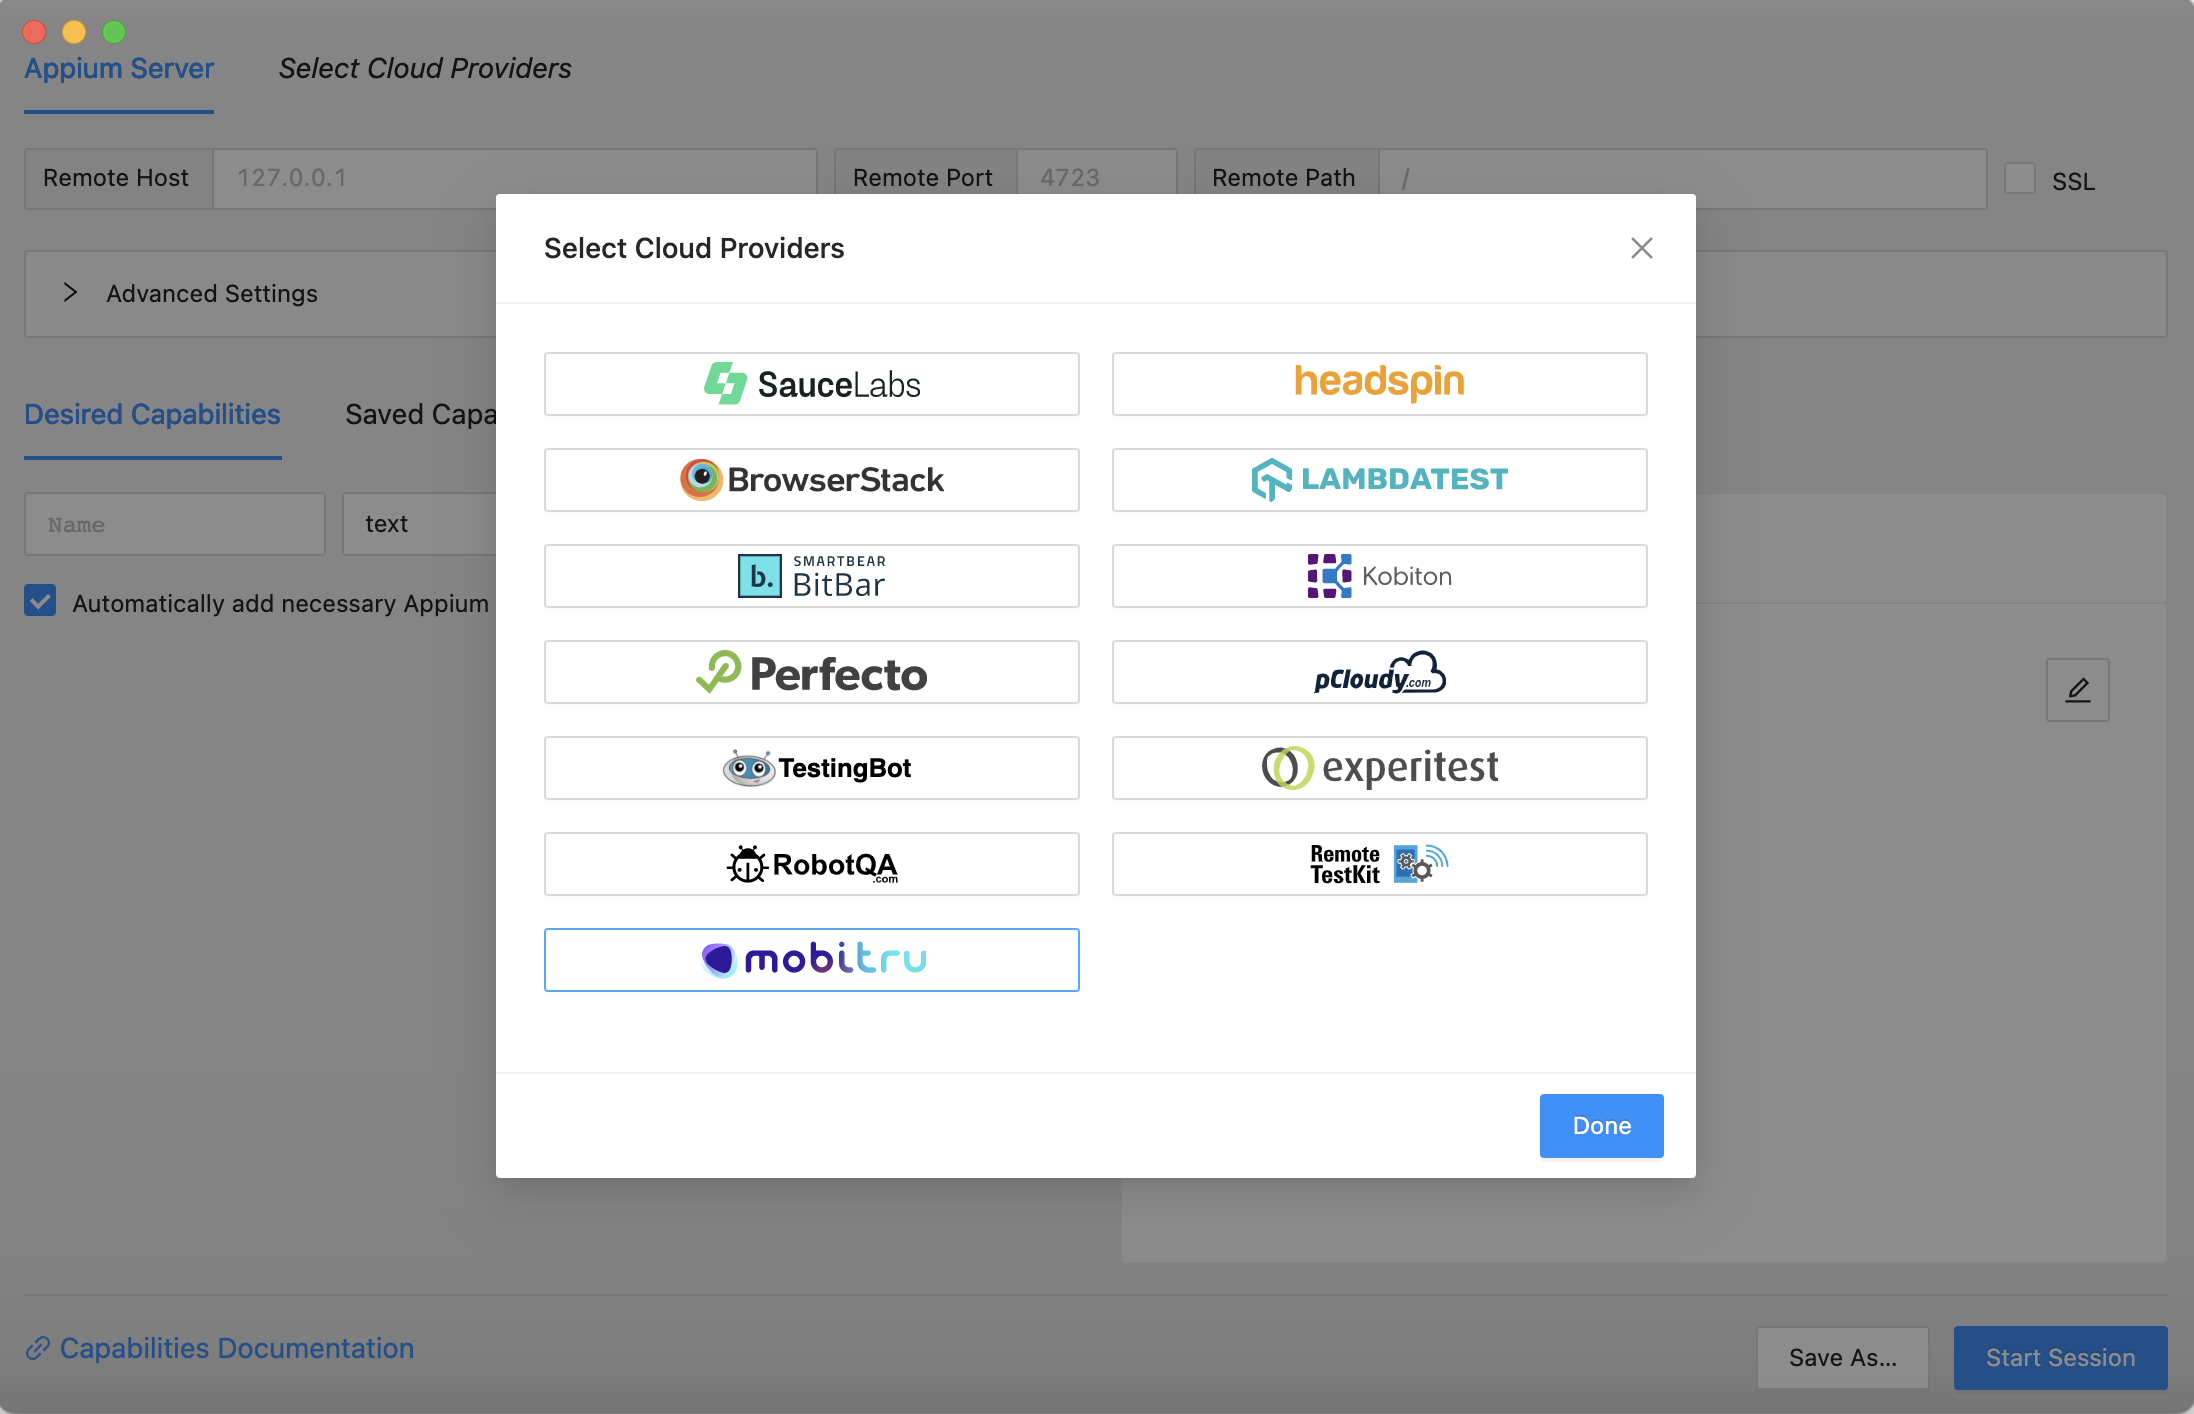
Step 4: Specify Mobitru credentials to connect our Appium server
On the newly opened screen, enter your mobitru billing unit (team account code or keyword personal in case of individual usage) and the Access key. The Webdriver URL can be default if you are working with devices on our primary platform instance:
Step 5: Configure desired capabilities and start a session
Configure session capabilities on the Desired Capabilities Tab. It’s required to specify platform details, device UDID, and application details (activity or bundle id). More details regarding supported capabilities can be found in Appium documentation.
Here is an example of minimally required desired capabilities for our iOS and Android demo apps:
{
  "platformName": "Android",
  "appium:udid": "28081FDH2009VP",
  "appium:automationName": "UIAutomator2",
  "appium:appPackage": "com.epam.mobitru",
  "appium:appActivity": ".MainActivity"
}
Appium Inspector view:
{
  "platformName": "iOS",
  "appium:udid": "00008110-001631C40E8B801E",
  "appium:automationName": "XCUITest",
  "appium:bundleId": "com.epam.mobitru.demoapp"
}
Appium Inspector view: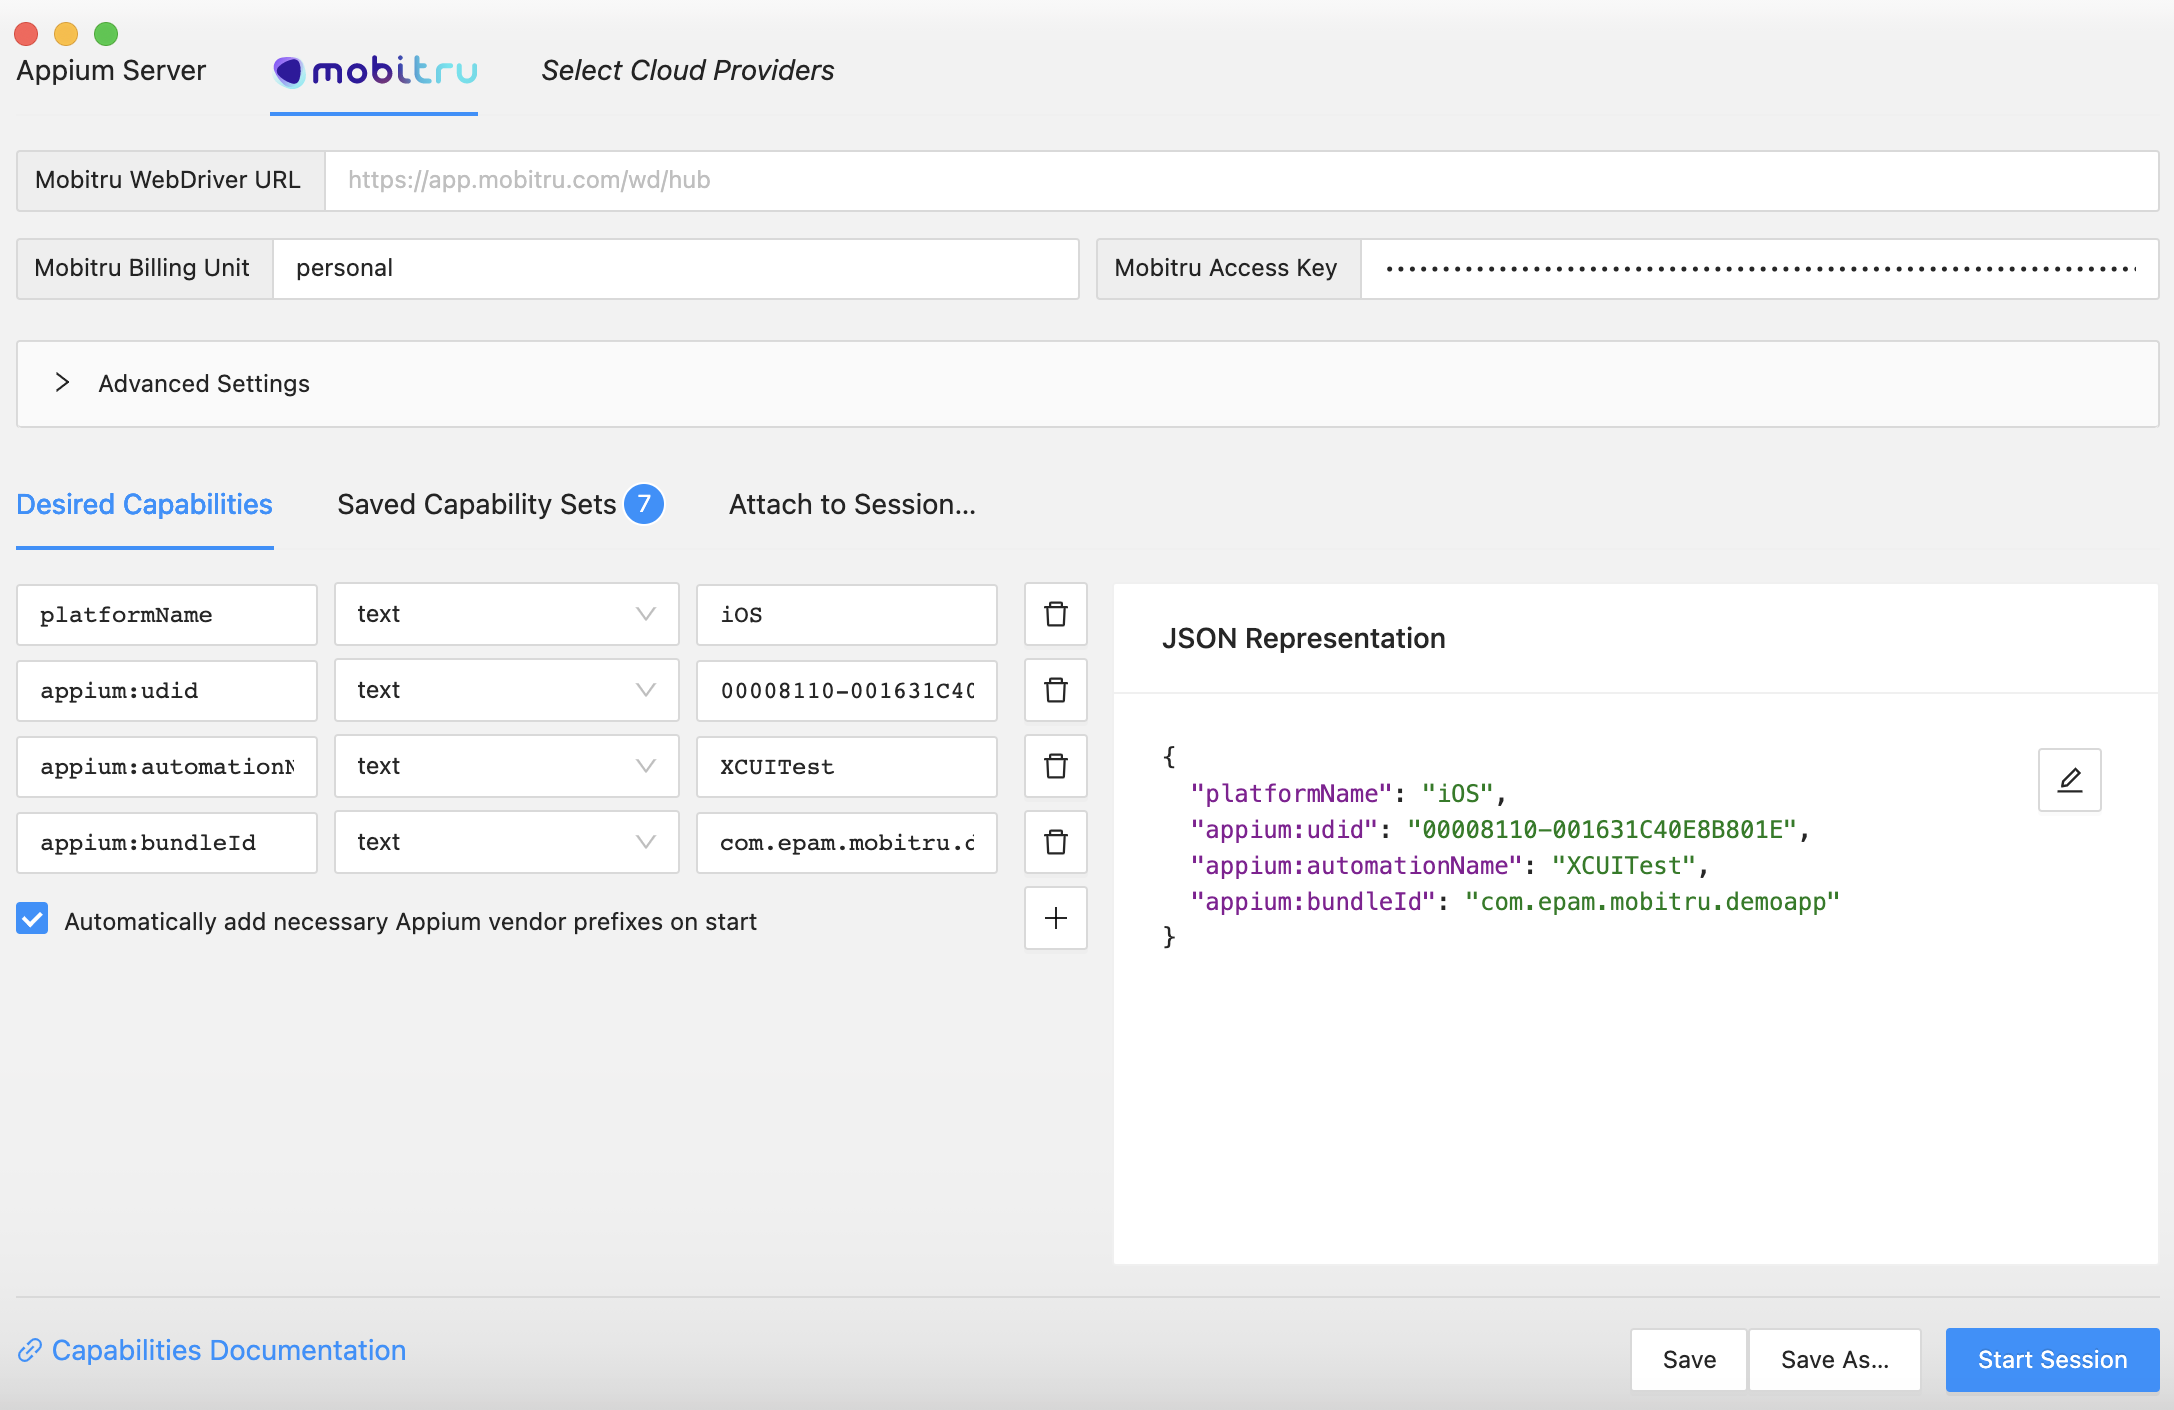
 | Keep the device after closing the Appium session: If you want to keep the device after closing the current Appium session, please add the “mobitru:keepDevice” capability with true as boolean value to the list of the Desired Capabilities: Important note: in this case, you will need to release the device manually on the Device area screen or use the API. |
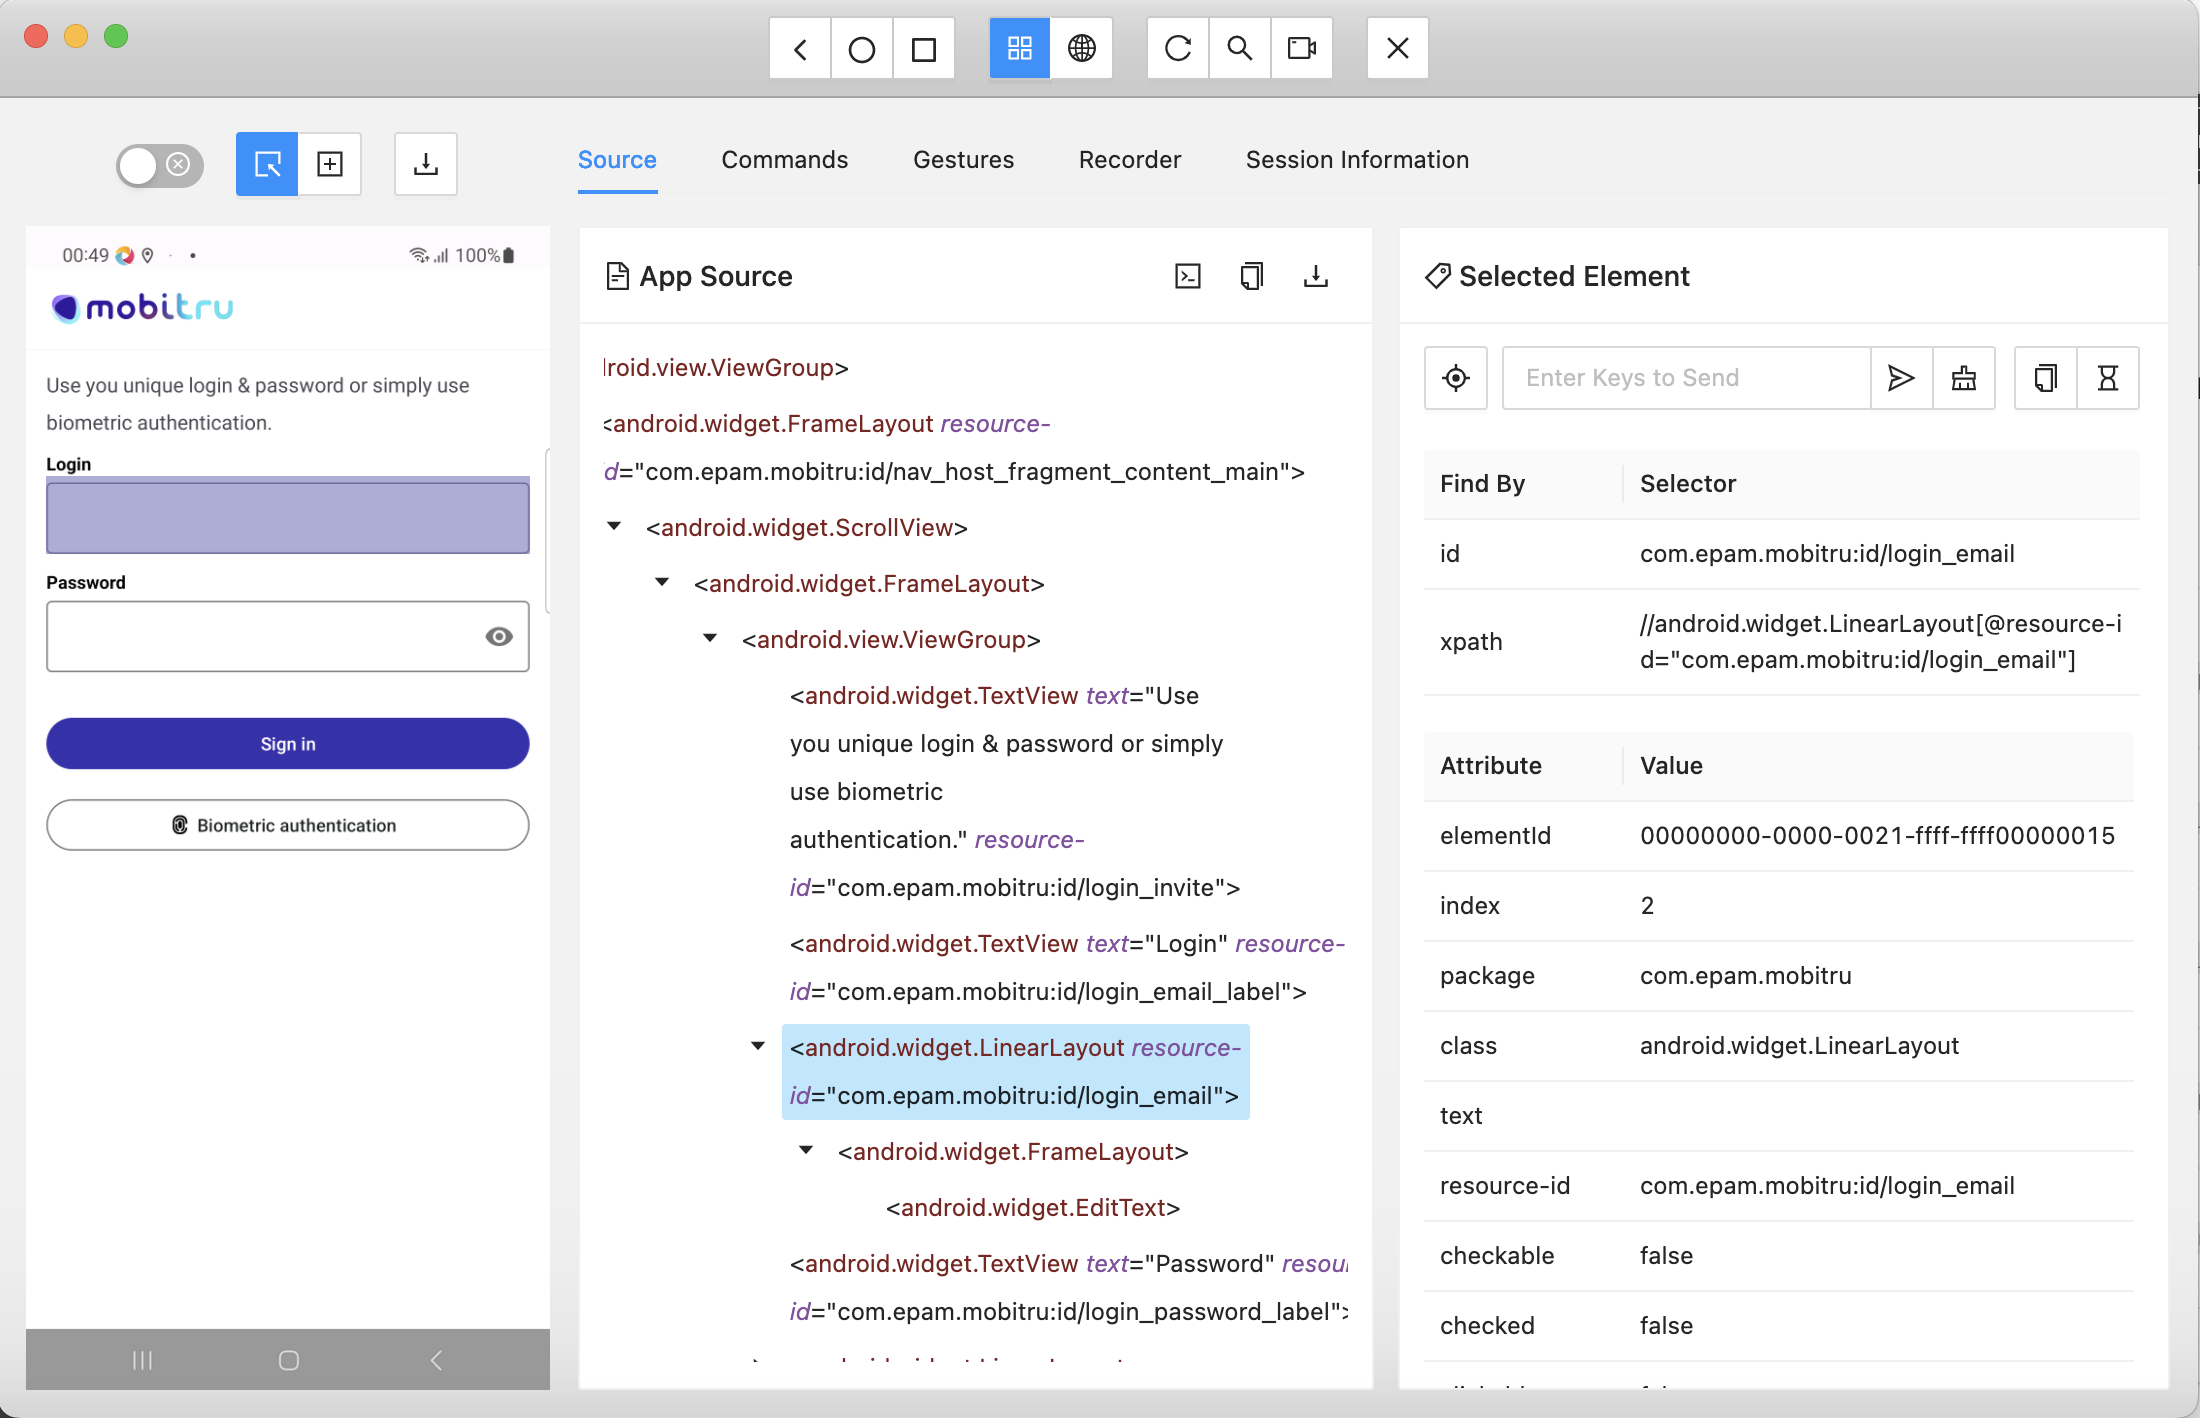
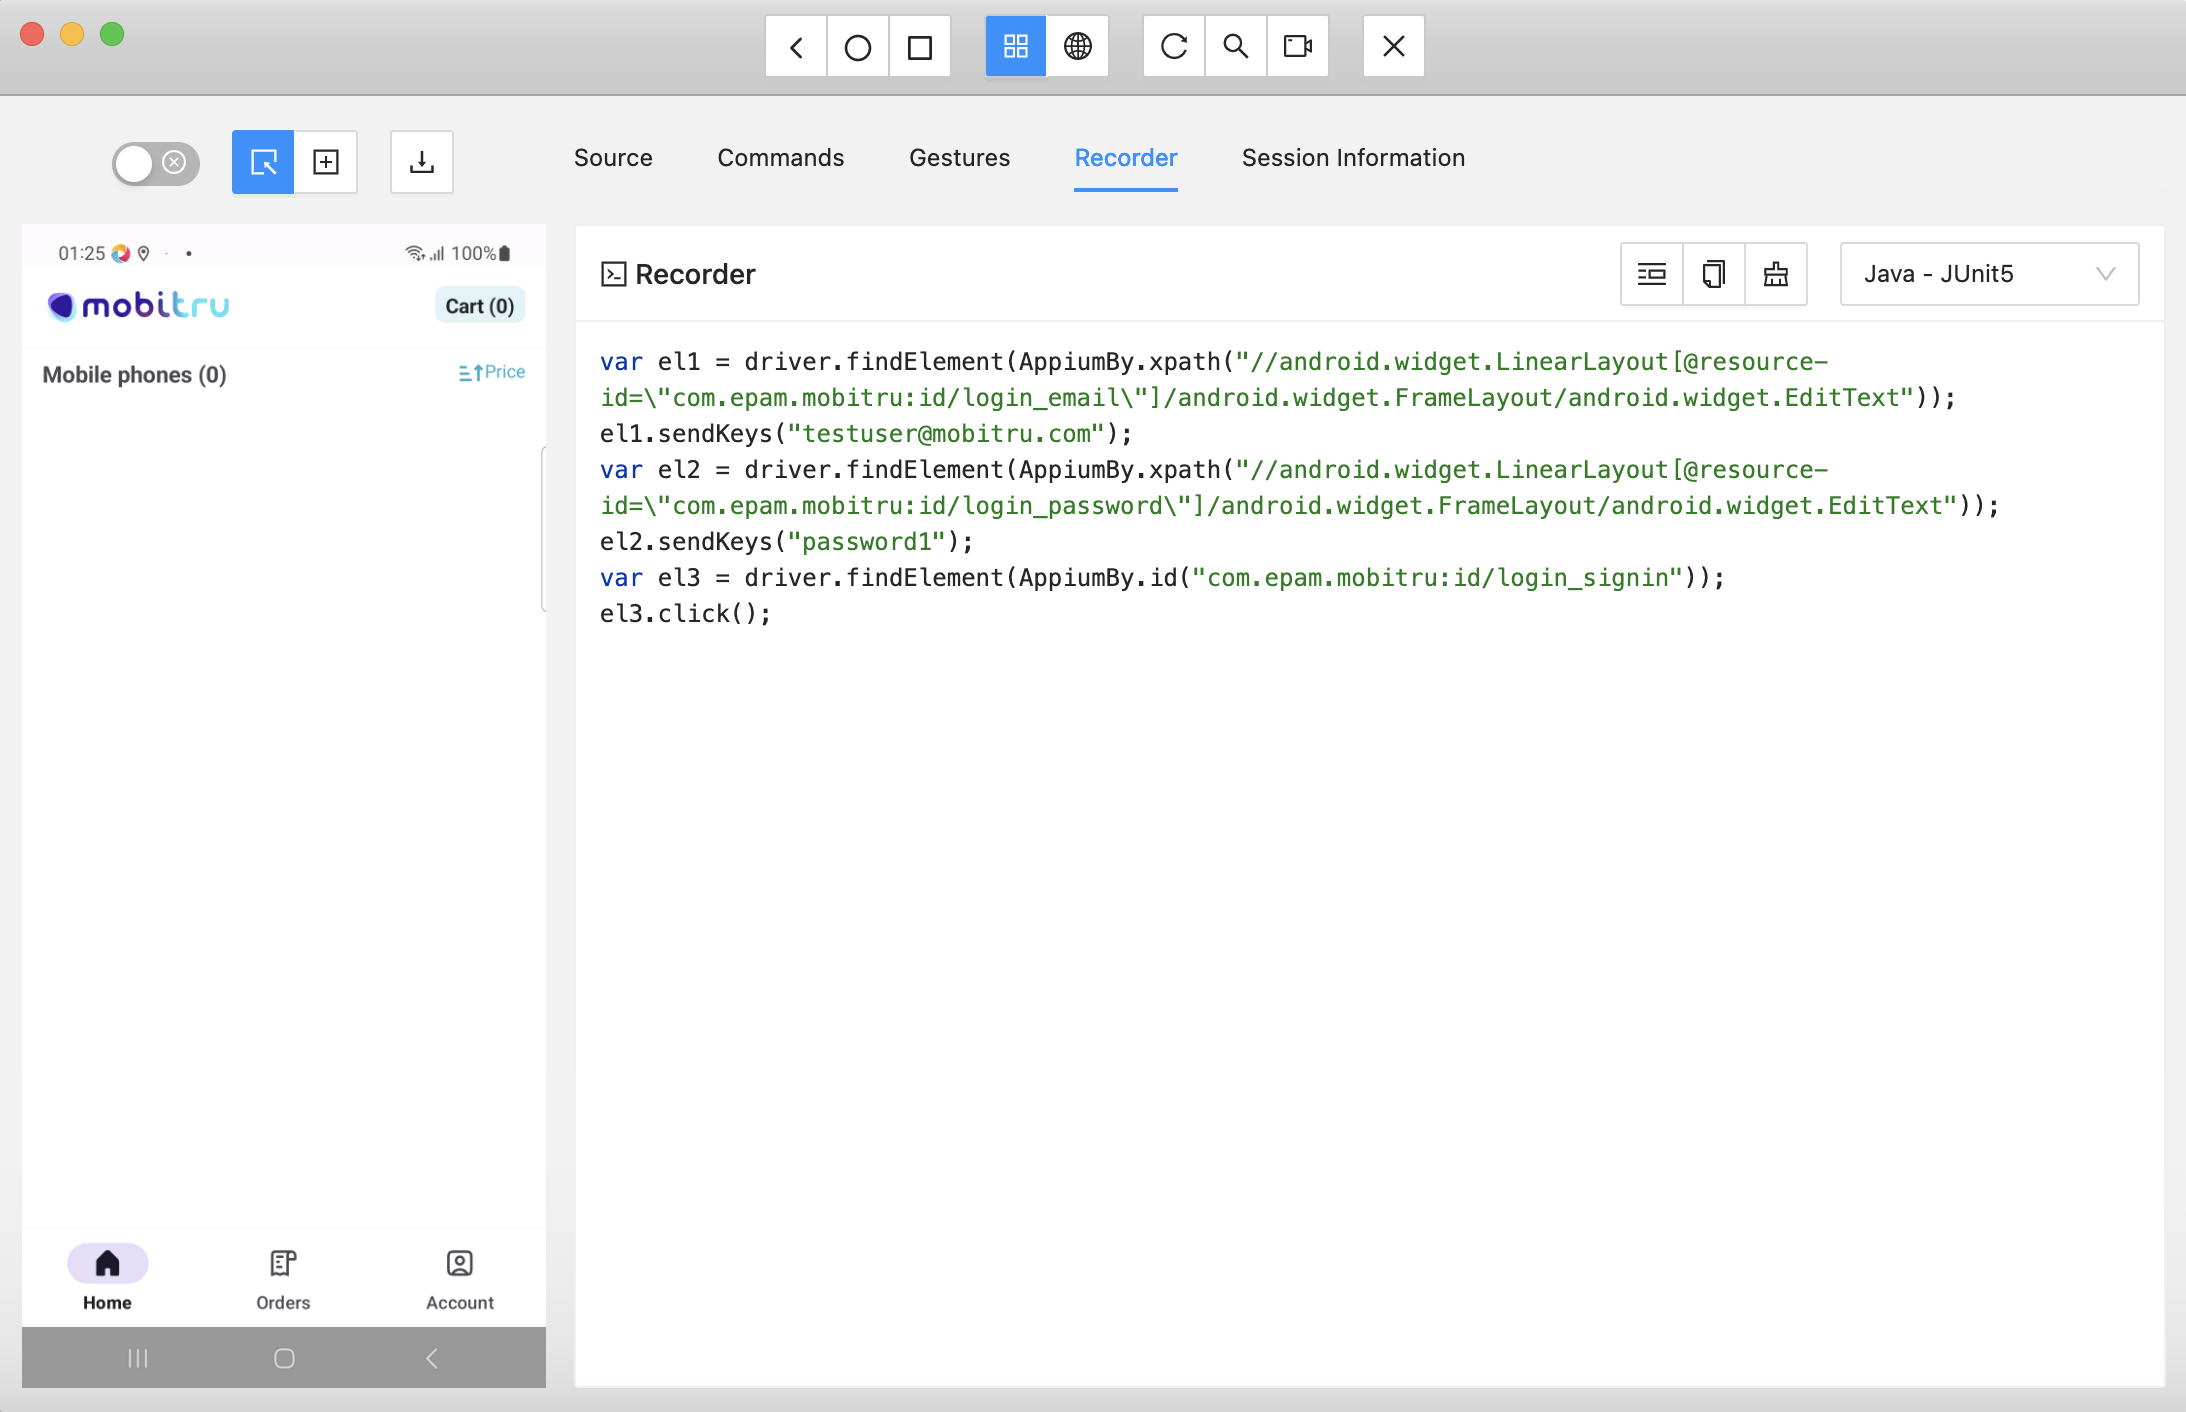
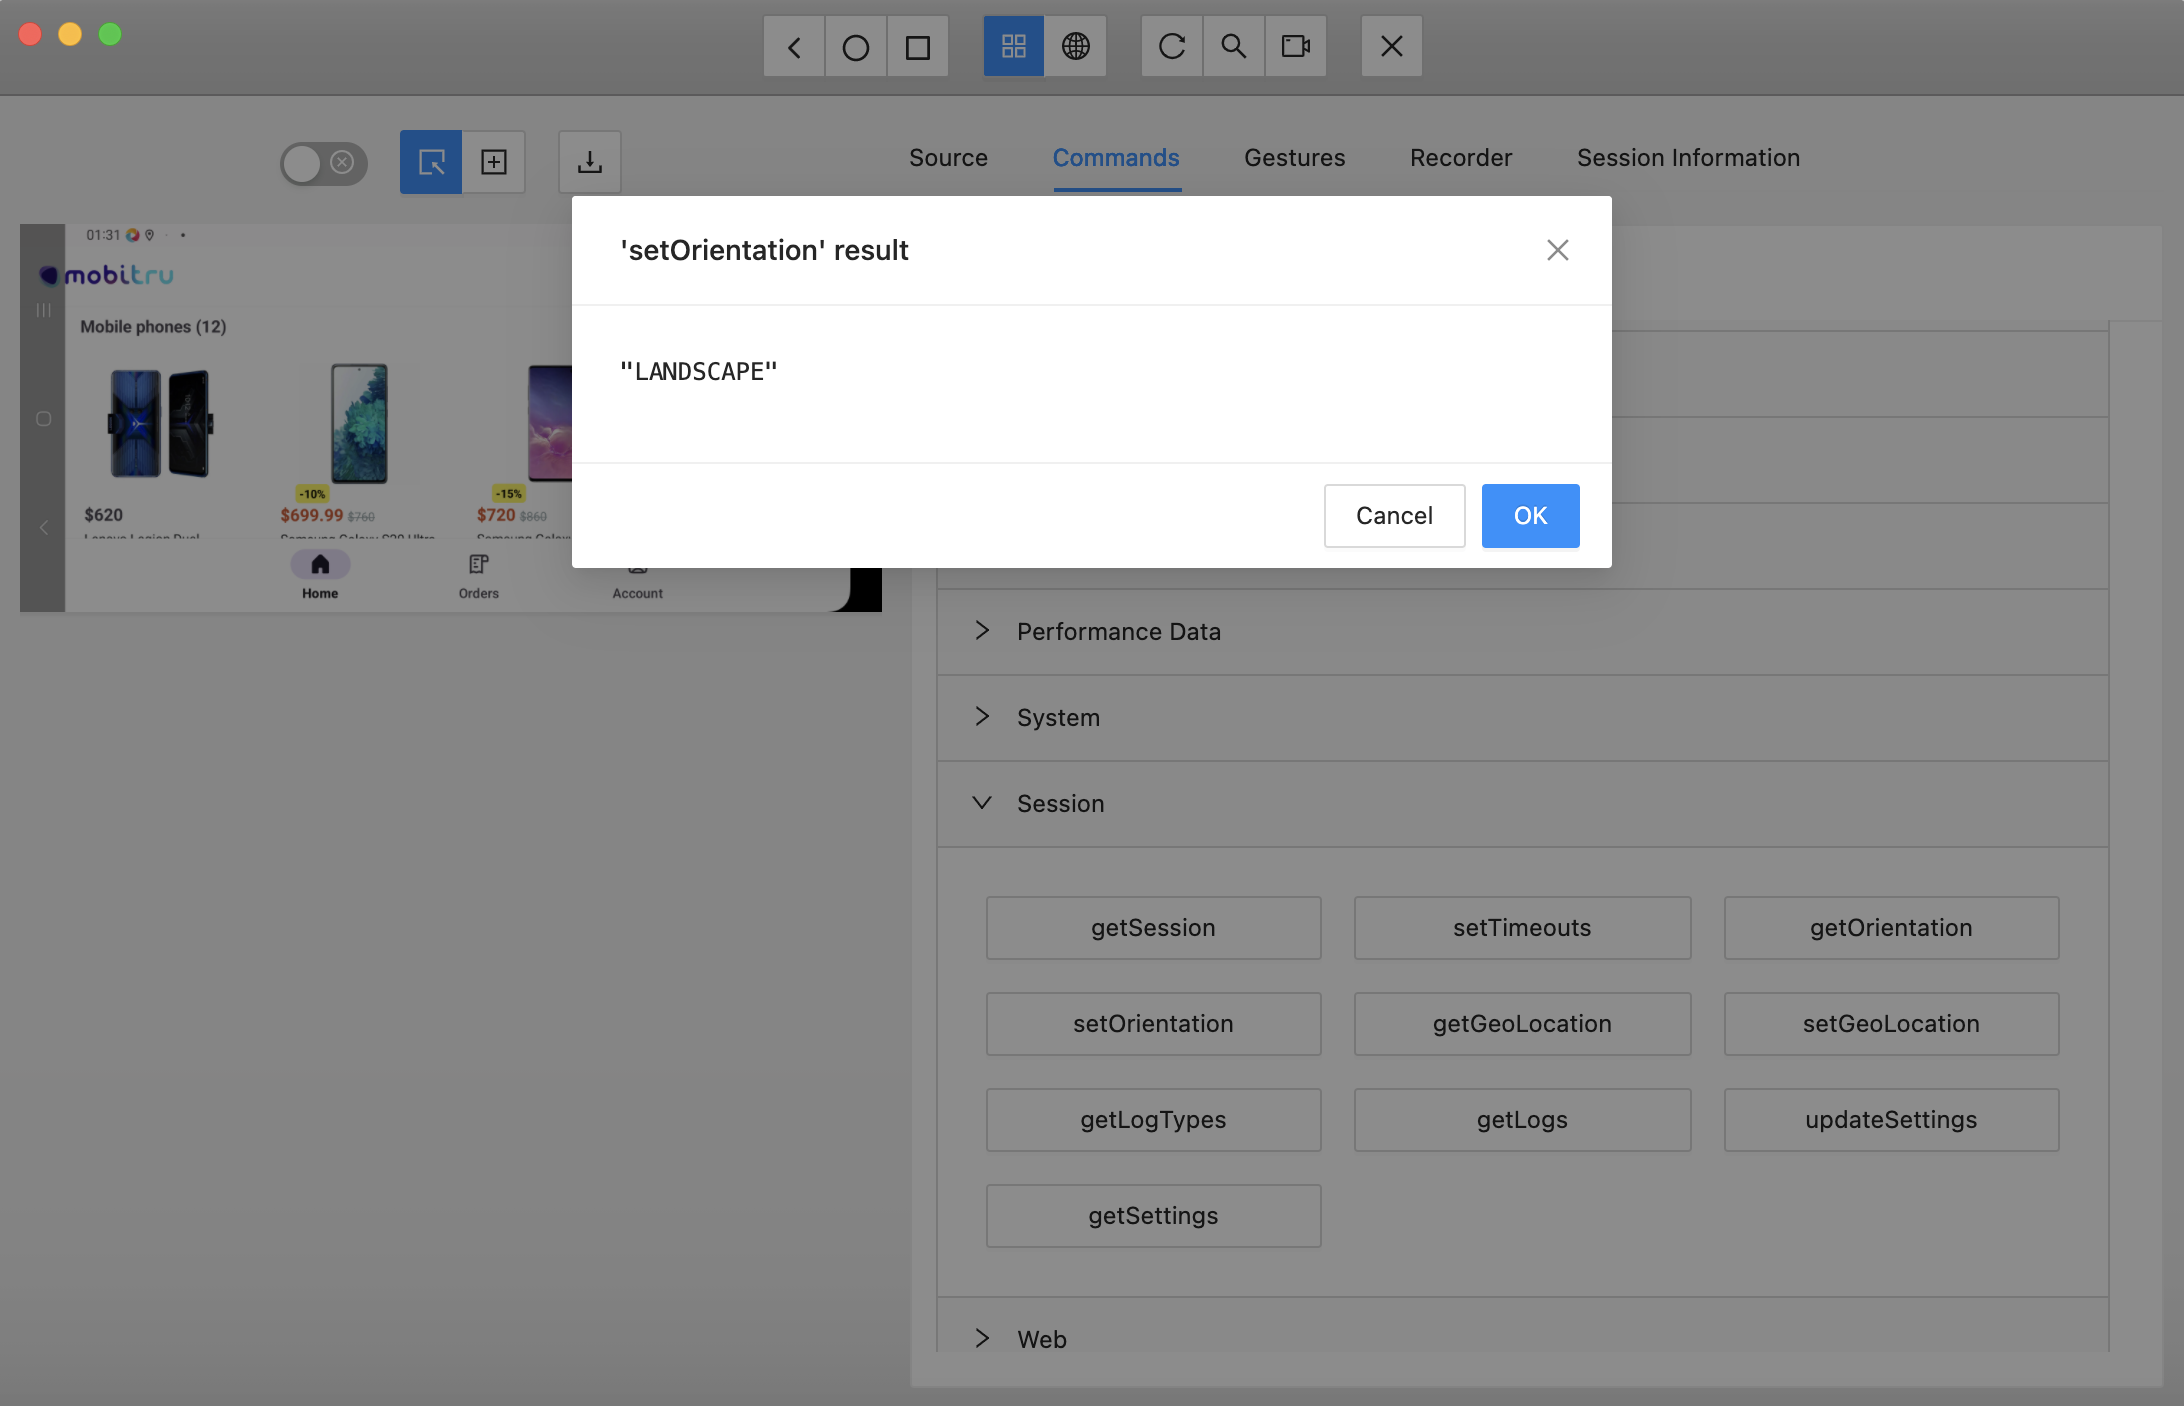
On successful connection with the Mobitru device, you will be able to inspect elements of your app, interact with them, record performed actions, and send commands to the OS: