Tricentis Tosca integration
Tricentis Tosca is a comprehensive test automation tool designed for end-to-end testing of software applications. It uses the model-based approach, allowing users to create reusable test cases and automate testing across various technologies, including web, mobile, and API.
More details can be found here.
Mobitru’s real devices can be connected with Tosca using Appium, which both platforms support.
To start testing your application:
Step 1: Find and take a device
Find and take the appropriate device on Devices tab or using our APIs:
Here is an example of cURL request to find a device via API:
Android:

curl --location --request GET 'https://app.mobitru.com/billing/unit/<BILLING_UNIT>/automation/api/device/android?model=Pixel 6' \
--header 'Authorization: Bearer <ACCESS_KEY>'

iOS:

curl --location --request GET 'https://app.mobitru.com/billing/unit/<BILLING_UNIT>/automation/api/device/ios?version=16.2' \
--header 'Authorization: Bearer <ACCESS_KEY>'
Here is an example of cURL request to take a device via API :
Android:

curl --location --request POST 'https://app.mobitru.com/billing/unit/<BILLING_UNIT>/automation/api/device/26281JEGR04493' \
--header 'Authorization: Bearer <ACCESS_KEY>'

iOS:

curl --location --request POST 'https://app.mobitru.com/billing/unit/<BILLING_UNIT>/automation/api/device/00008101-00042D8A1190001E' \
--header 'Authorization: Bearer <ACCESS_KEY>'
Step 2: Upload and install your app
Upload your Android app (.apk file) or iOS app (.ipa file) to the Mobitru and perform the app installation in the Device area or using our REST API.
Here is an example cURL request to upload the app:
curl --location --request POST 'https://app.mobitru.com/billing/unit/<BILLING_UNIT>/automation/api/v1/spaces/artifacts' \
--header 'x-File-Name: AppDemo.apk' \
--header 'X-Content-Type: application/zip' \
--header 'Authorization: Bearer <ACCESS_KEY>' \
--form 'file=@"/path/to/app/file/app-debug.apk"' \
--form 'checksum="None"'
Here is an example of cURL request to install the app via API (app id could be found in response of upload request):
curl --location --request GET 'https://app.mobitru.com/billing/unit/<BILLING_UNIT>/automation/api/storage/install/<device_udid>/<uploaded_app_id>' \
--header 'Authorization: Bearer <ACCESS_KEY>'
As a result, you will receive 201 Created response.
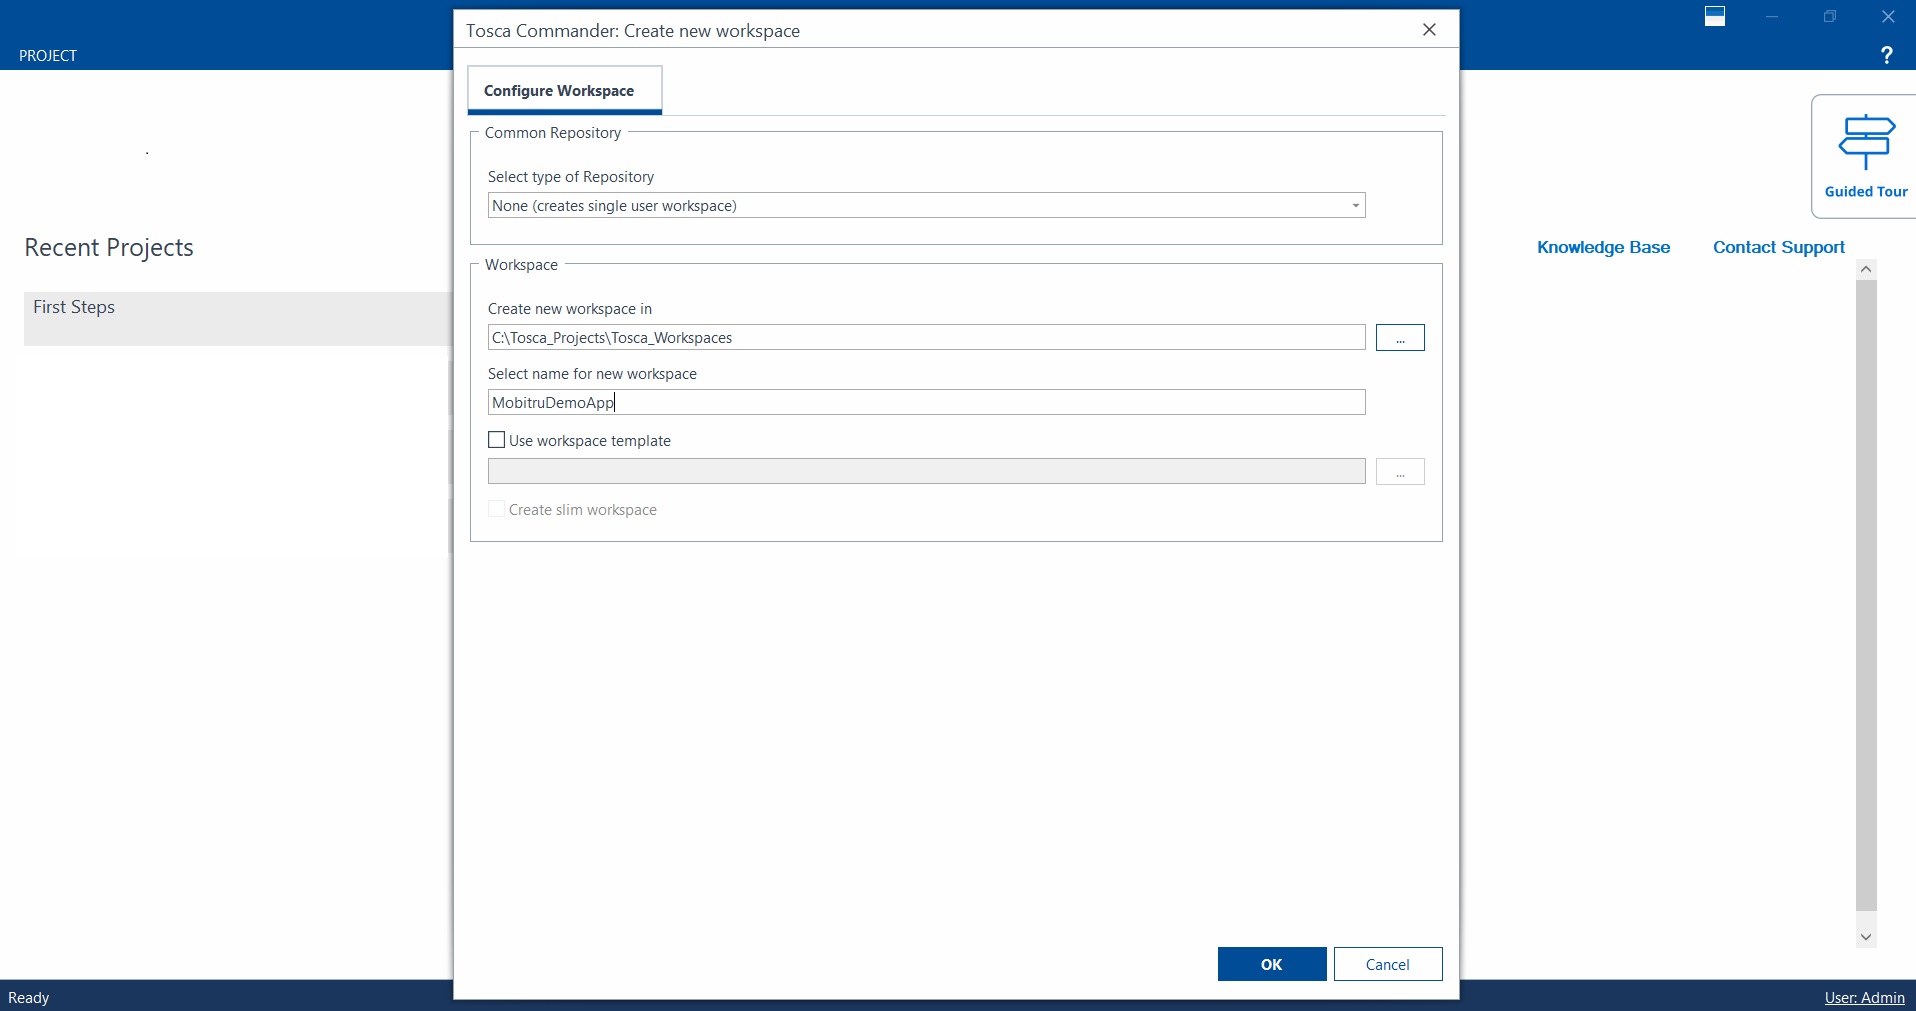
Step 3: Open the Tricentis Tosca and start to create a new workspace
:
Step 4: Create a connection to Mobitru in the Mobile Scan module
In the newly created workspace, go to the Modules tab, click on Scan, and choose the Mobile option.
After that, please click on Add connection and enter the full Appium server address, which should contain the billing unit name and an API key.
More details on how to build the server address can be found here.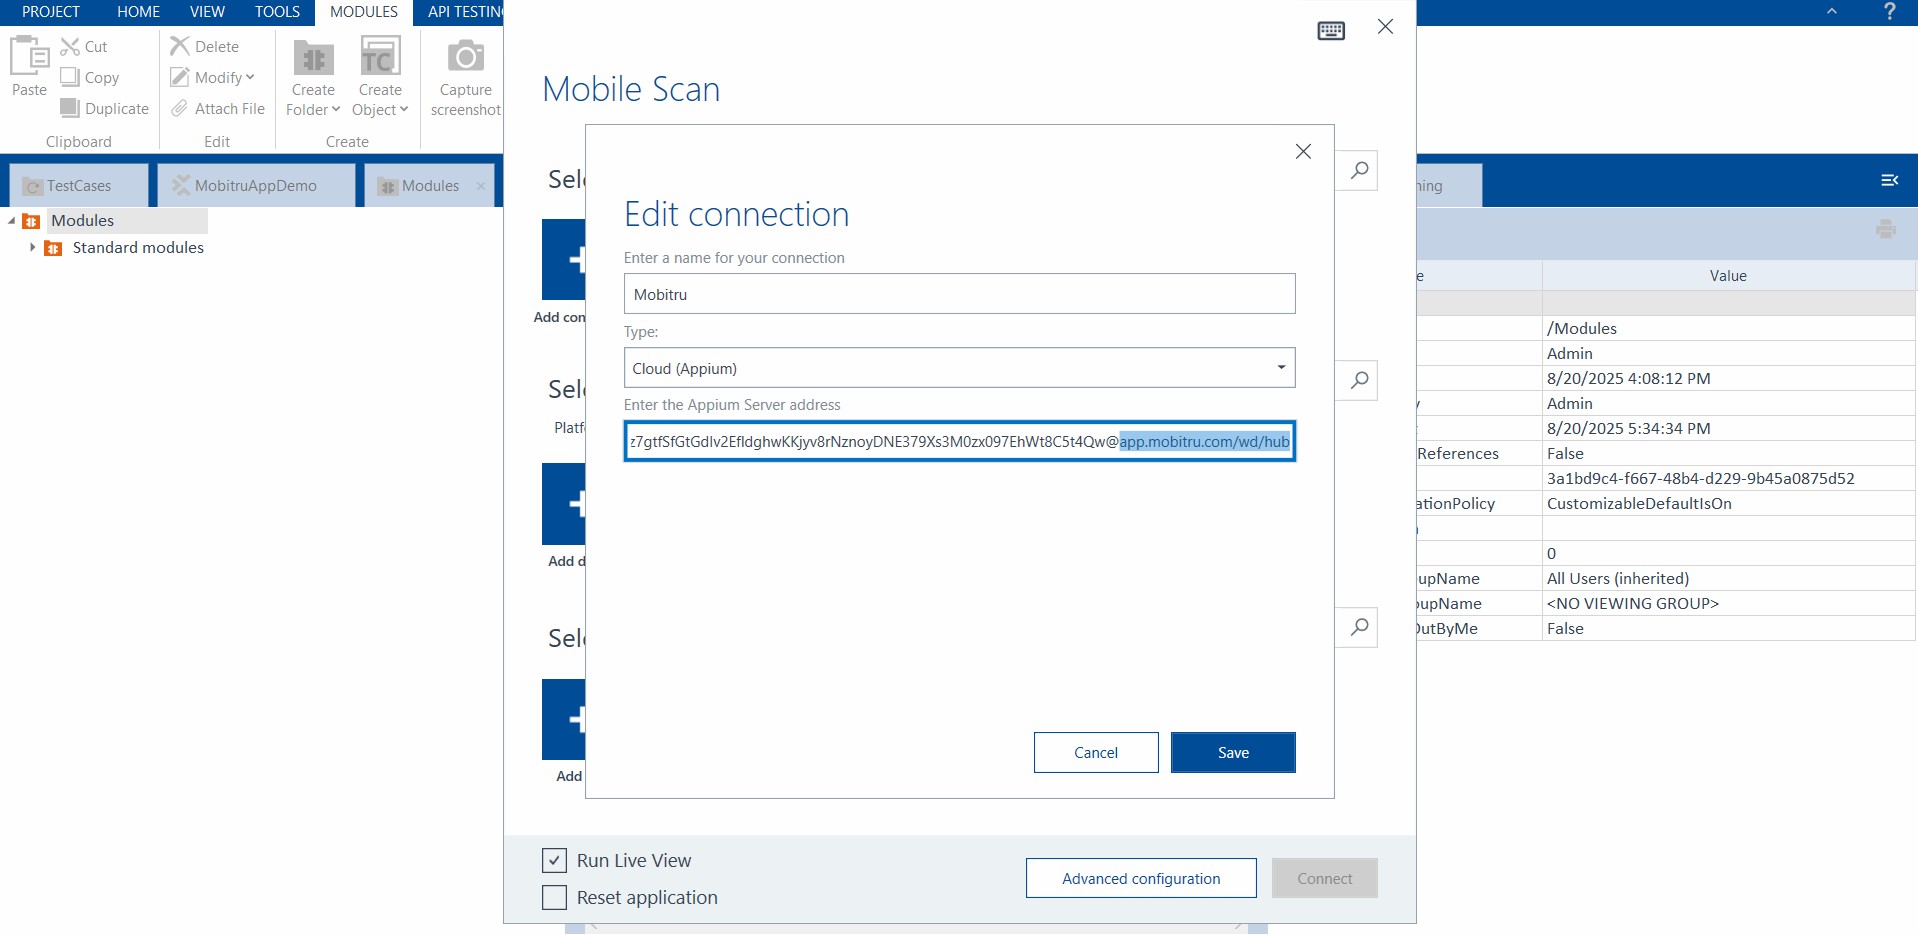
Step 5: Add the selected Device info
After adding the connection, please click on the Add device button and enter the device name and UDID: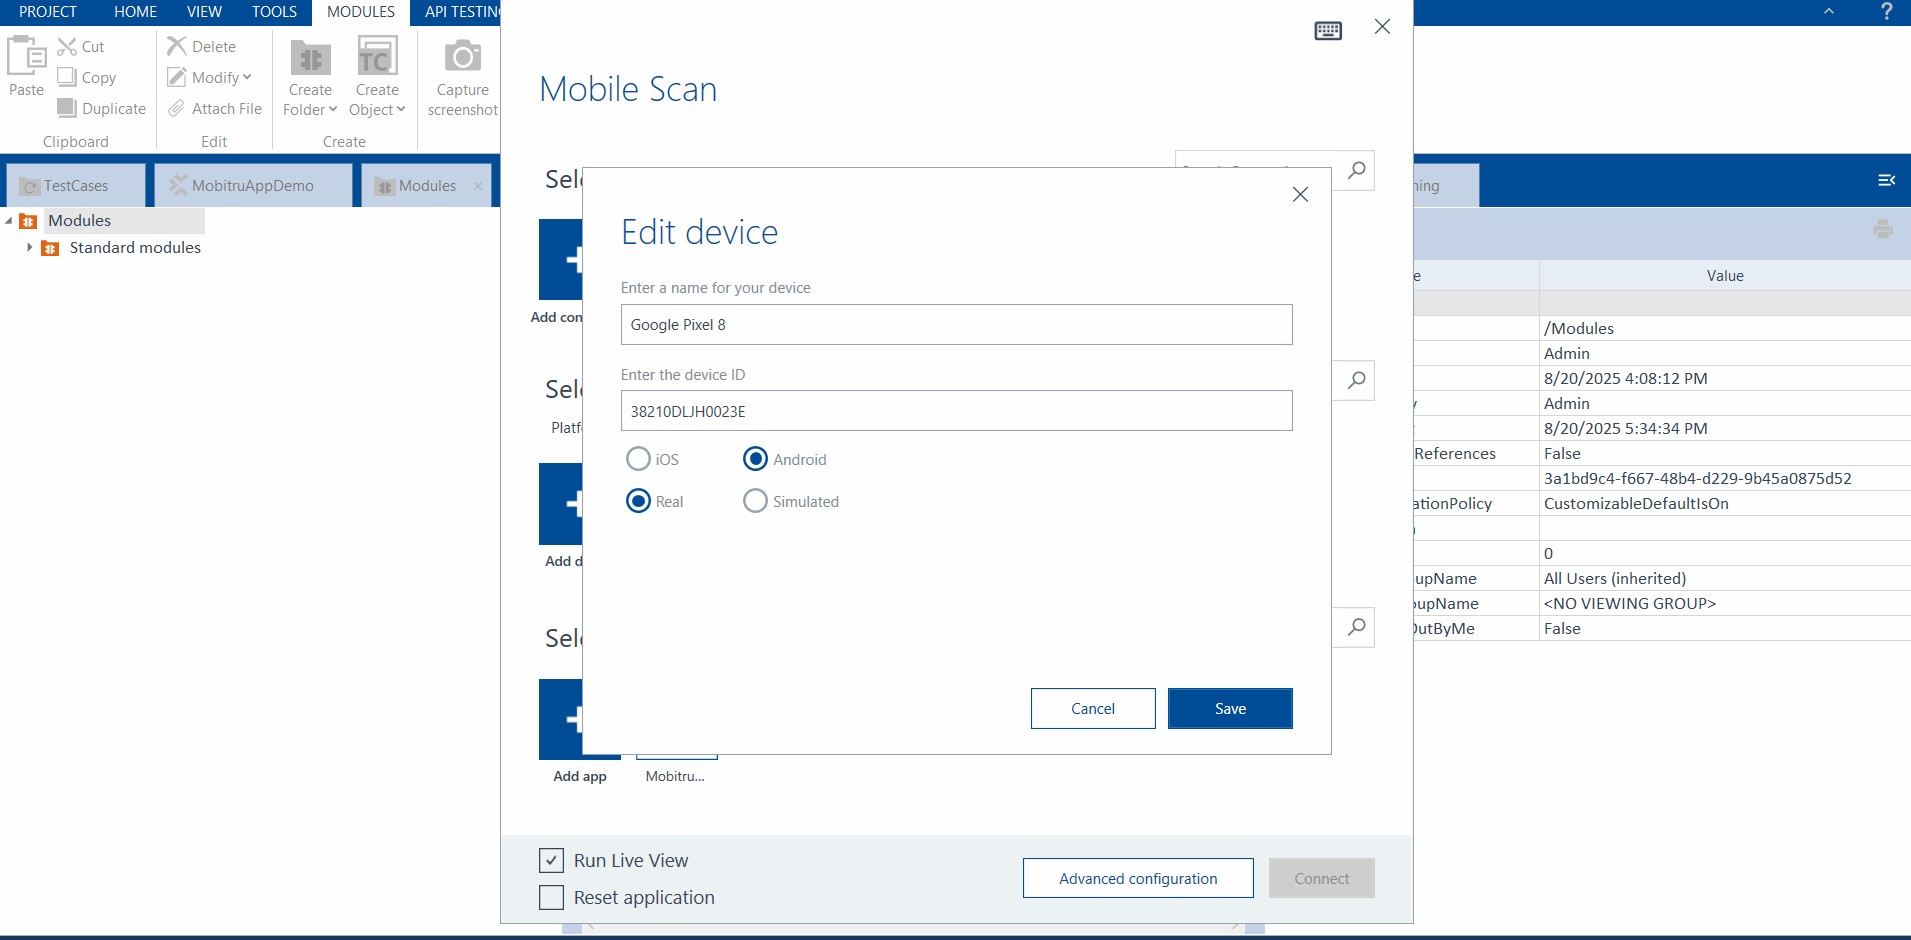
Step 6: Add the application details
After adding the device, please click on the Add app button and enter the application name and connection details (bundleId for iOS or PackageName/ActivityName for Android):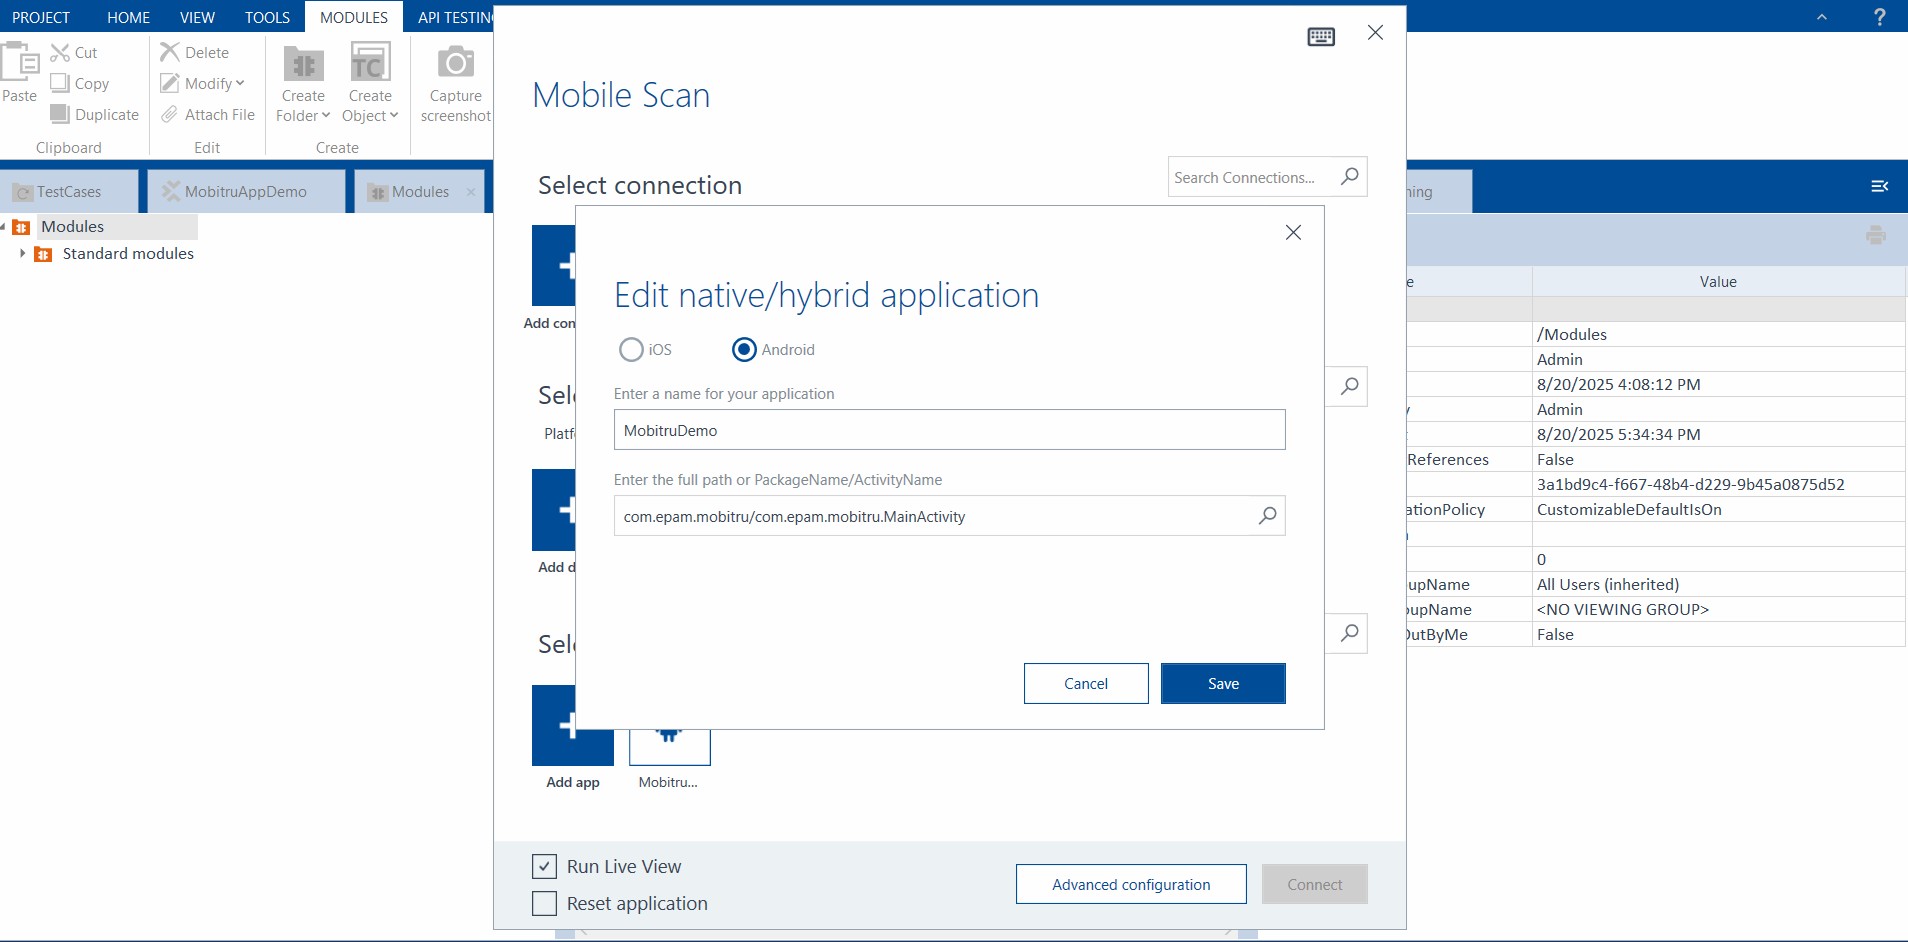
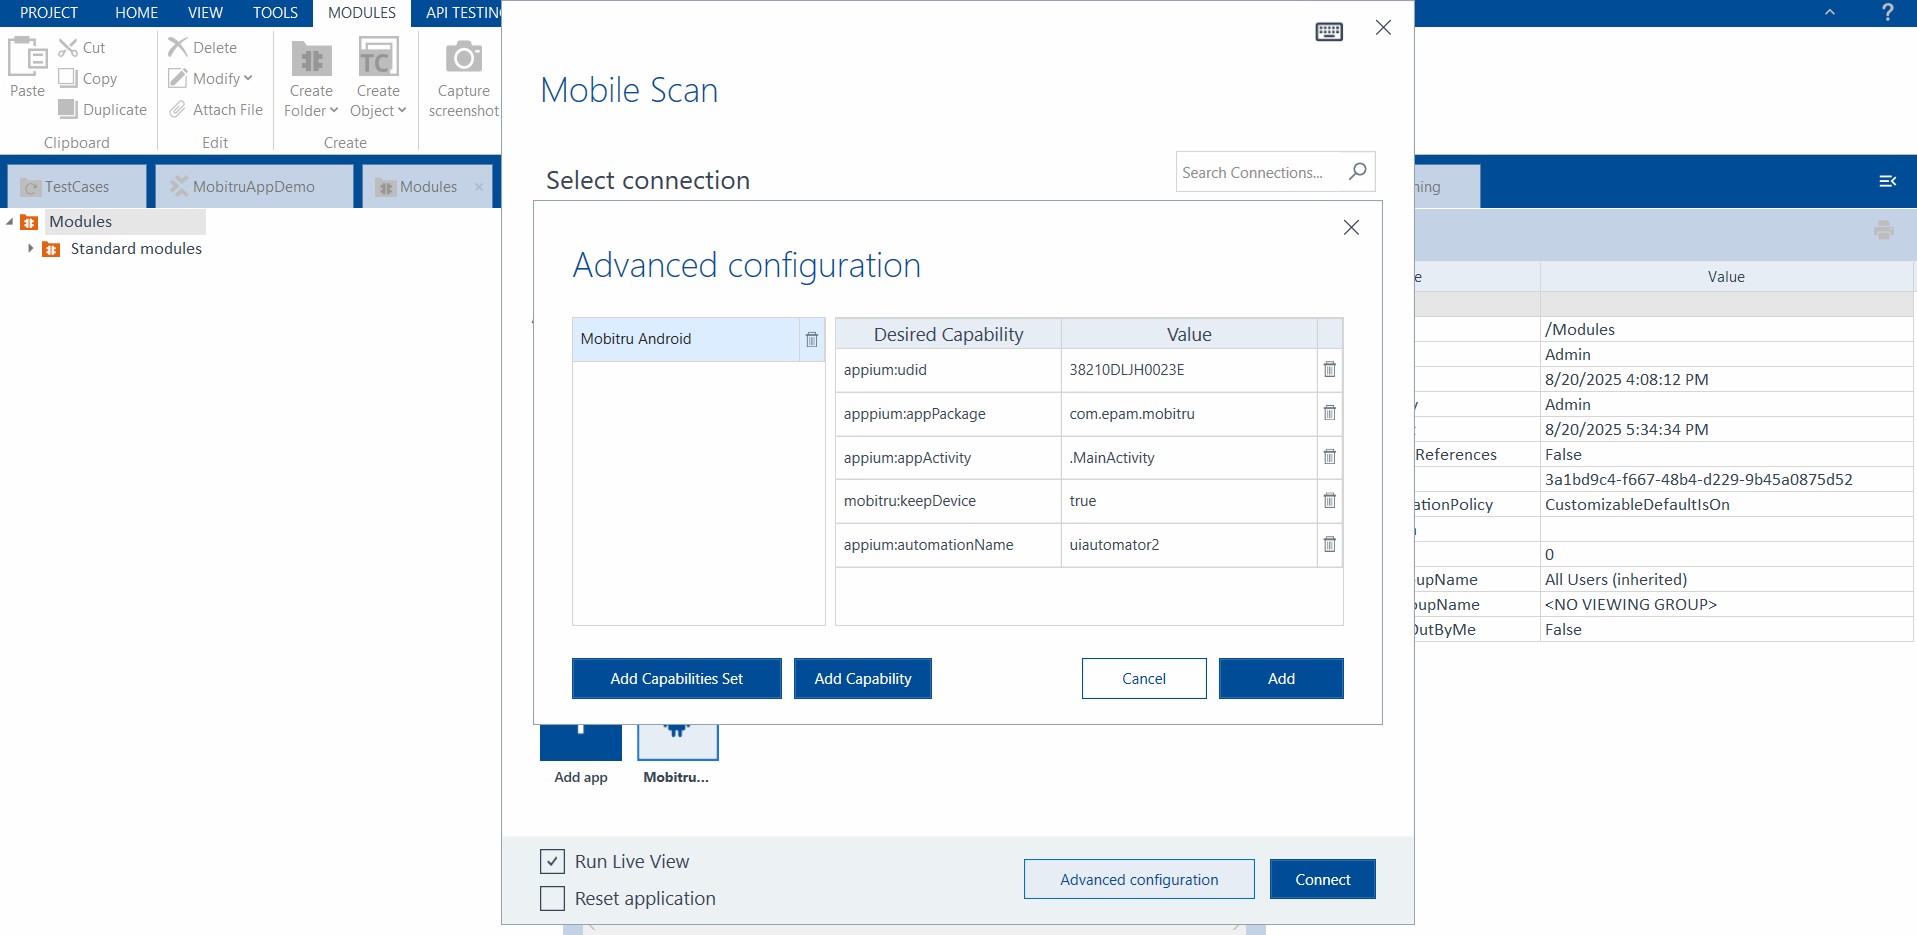
Step 7: Add the advanced Appium connection settings
After adding the app details, please click on the Advanced configuration button and the additional Appium connecting settings, which include:
- appium:udid – the serial of the selected Device
- appium:automationName – the name of the Appium driver to interact with the Device.
- mobitru:keepDevice – the flag to enable or disable the device release after closing the scan session.
- Android:
- appium:appPackage – the Android application’s package name
- appium:appActivity – the Android application’s activity
- iOS:
- appium:bundleId – the iOS application’s unique identifier
Step 8: Confirm the Device Connection
After adding all details, please click on the Connect button and wait for the Connection established view to be shown: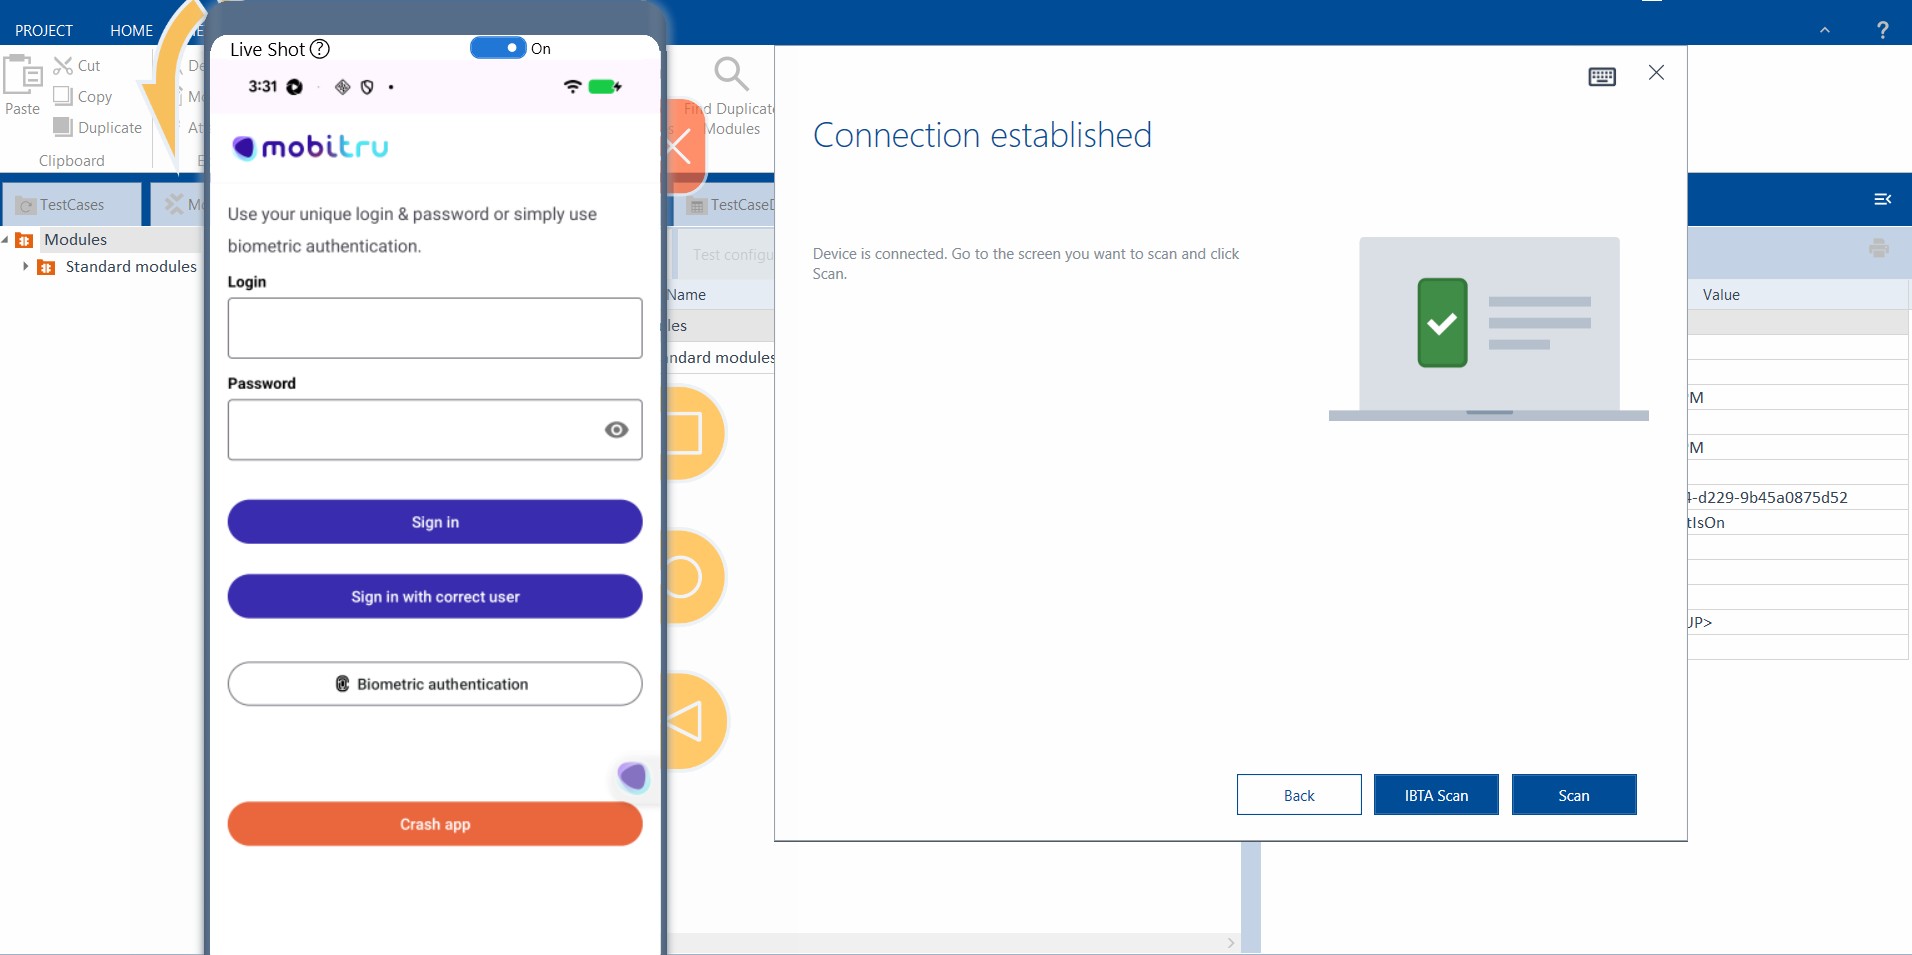
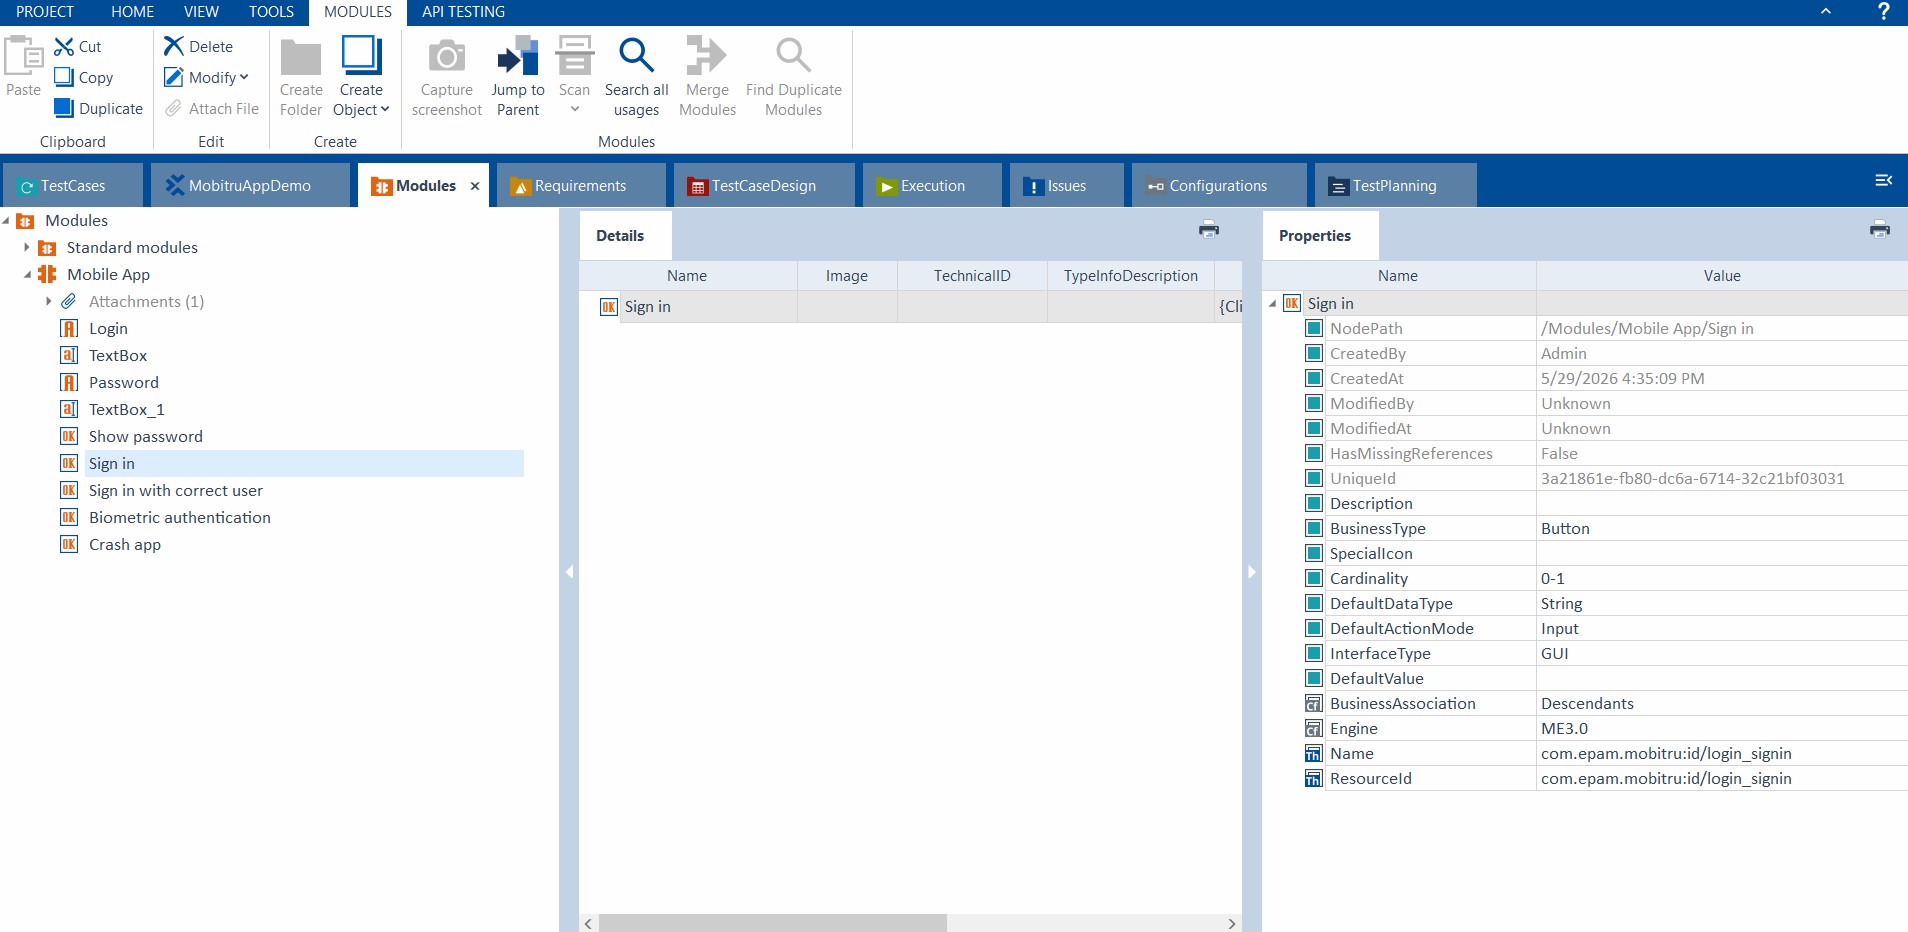
Then you can perform the Scan actions for your application to prepare the modules, which will be used in the Test Case steps: